Getting Started

In this guide, you will learn to:

  • create and fund a host distribution account that may be used to fund tenant-level distribution accounts or directly for making payments
  • set up an instance of the Stellar Disbursement Platform (SDP) locally
  • provision a new tenant and create login credentials for users belonging to tenant
  • set up a Stellar account to accept funds as a receiver
  • make your first disbursement
  • register your receiver account with the SDP
  • check your account balance after receiving payment

By the end of this guide, you'll have a clear understanding of the Stellar Disbursement Platform's functionality and a working local setup ready for development or testing.

Note that while we'll be using USDC and the Demo Wallet in this guide, other Stellar assets and wallets can be used in development or production.

Create and Fund a Host Distribution Account

You'll need a minimum of two accounts when using the Stellar Disbursement Platform, a distribution and receiver account. We'll create the distribution account now and will create the receiver account while making our first disbursment.

  1. Go to the Stellar Demo Wallet and select "Generate keypair for new account"
  2. Select the "Create account" button next to the public key to fund your account with XLM
  3. Select the "Select from preset assets" button, and select USDC
  4. Finally, select "Add trustline" to enable payments of USDC

Now that we have an account that can send & receive USDC, lets fund it with enough USDC for our first disbursement. You can fund your distribution account from any liquidity source of Stellar USDC but here's how do it through the Circle Sandbox and Stellar Laboratory.

  1. Create a Circle Sandbox account
  2. Once you're at the dashboard, Select "Get API Key", and copy it to your clipboard
  3. Go to the Circle Sample App and enter your API key after selecting the settings icon in the top right corner
  4. Select "Charge Flow", then "Prefill Form", and select a card to use (it doesn't matter which)
  5. Enter the amount you'd like to purchase, then select "Make Payment"

This will fund your Circle Sandbox Account with USDC. You can repeat the process above when you run out or the test network resets, which happens quarterly.

Your USDC should appear in your account within a few minutes, which you can check using the balances endpoint. Once funded, you can send it to your distribution account created earlier.

  1. Select the icon in the top left, then "Payouts API", and finally "POST /transfers"
  2. Select "Get Master Wallet ID" to load the wallet funded with USDC
  3. Enter the amount you'd like to send
  4. Select the "blockchain" destination type and then "XLM"
  5. Paste the public key of the account you created with the demo wallet earlier
  6. Select "Make API Call"

Circle will submit payment of USDC to the Stellar test network and you should receive funds in your demo wallet account almost immediately!

You can also acquire USDC through the Stellar Laboratory if you prefer. Before starting, make sure your demo wallet account is funded with XLM and has a trustline to USDC. Build a transaction in the Laboratory with your demo wallet account as the source account. Create a Path Payment Strict Send operation with the same account as the destination account. Use XLM (native) as the sending asset and USDC issued by GBBD47IF6LWK7P7MDEVSCWR7DPUWV3NY3DTQEVFL4NAT4AQH3ZLLFLA5 as the destination asset. You can set your preferred minimum destination amount based on how much XLM you send but the amount isn't important in testnet. A very low minimum will ensure the trade. Sign the transaction and submit to the network.

USDC will arrive in your demo wallet account within seconds! Refresh the account on the demo wallet page to see the new balance.

Run the SDP Locally

Prerequisites

Docker

Make sure you have Docker installed on your system. If not, you can download it from here.

Stellar Accounts

We will need two Stellar accounts to set up the SDP, one of which you already created above.

  1. A Host Distribution account that will be used for sending funds to receivers. You should have just created this account using the Create and Fund a Host Distribution Account process above.
  2. A SEP-10 account that will be used for authentication. It can be created the same way as the distribution account, but it doesn't need to be funded. Make sure to create this account now if you haven't already done so.

The public and private key of these two accounts will be used to configure the SDP in the next step.

Run the SDP

First you'll need to clone the project.

git clone [email protected]:stellar/stellar-disbursement-platform-backend.git

Before we run the SDP, we need to configure it with the accounts created in the previous step.

cd stellar-disbursement-platform-backend/dev

Create a .env file in the dev directory by copying the .env.example file:

cp .env.example .env

Update the .env file with the public and private keys of the two accounts created in the previous step.

Execute the following command to create all the necessary Docker containers needed to run SDP as well as provision sample tenants:

./main.sh

This will bring up the following services:

  • sdp_v2_database: The main SDP and TSS database.
  • anchor-platform-postgres-db: Database used by the anchor platform.
  • anchor-platform: A local instance of the anchor platform.
  • sdp-api: SDP service running on port 8000.
  • sdp-tss: Transaction Submission service.
  • sdp-frontend: SDP frontend service running on port 3000.
  • kafka: Kafka service running on ports 9092, 9094(external).
  • kafka-init: Initial workflow to exec into the Kafka container and create topics.
  • demo-wallet: The demo wallet client that will be used as a receiver wallet, running on port 4000.

If you wish to start the sdp containers with monitoring services, you can use the docker-compose-monitoring.yml file

docker-compose -f docker-compose.yml -f docker-compose-monitoring.yml up

The following are optional monitoring services that can be started through docker-compose-monitoring.yml and are primarily used for monitoring Kafka:

  • db-conduktor: Database instance for the Conduktor service.
  • conduktor-monitoring: Conduktor Monitoring service integrated into the Conduktor Platform.
  • conduktor-platform: Provides solutions for Kafka management, testing, monitoring, data quality, security, and data governance.

New Tenant Provisioning Process

When you ran main.sh file, you've already created new tenants: tenants=("redcorp" "bluecorp"). To add more tenants, simply append them separated by spaces to that variable like so: tenants=("redcorp" "bluecorp" "greencorp") and run main.sh again.

Be sure that the added tenant hosts are included in the host configuration file. To check it, you can run the command cat /etc/hosts. To include them, you can run command sudo nano /etc/hosts and insert the lines below:

127.0.0.1       bluecorp.sdp.local
127.0.0.1 redcorp.sdp.local

Setup Owner User Password for each tenant

Go through the forgot password flow to be able to login as an owner user.

Go to Forgot Password page on http://${tenant}.stellar.local:3000/forgot-password and enter the tenant and owner email owner@${tenant}.org.

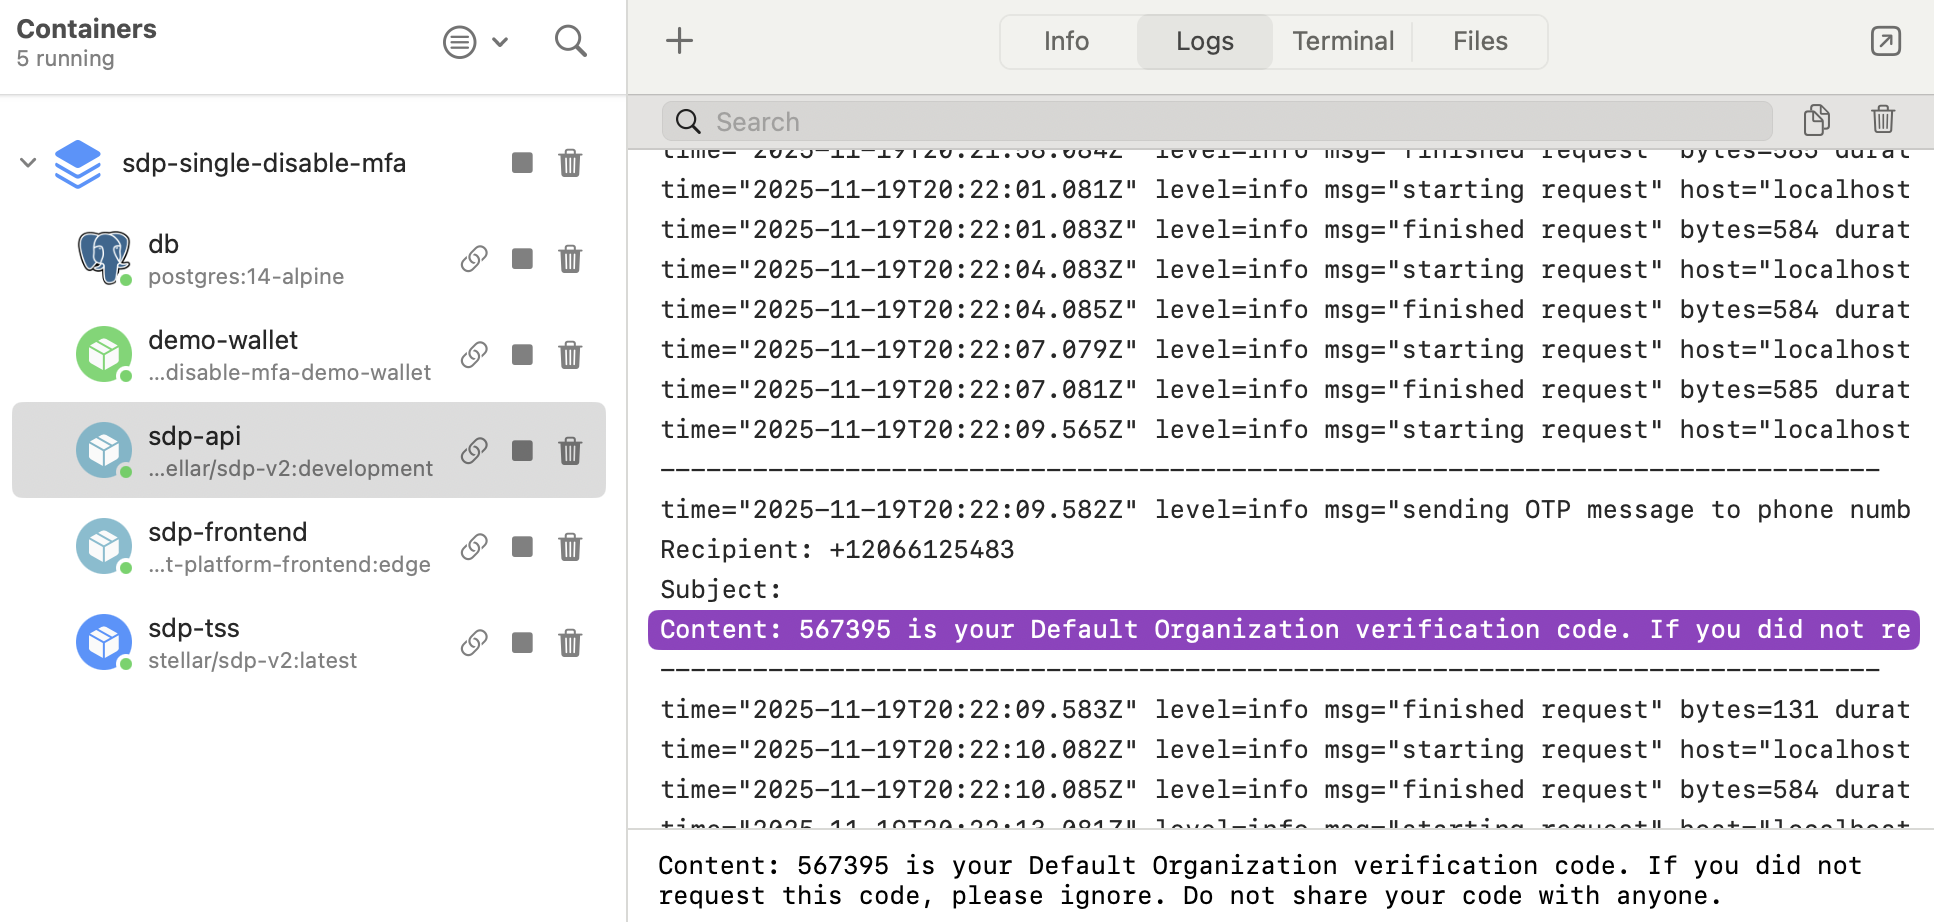
A token will be generated, and it's possible to check it on sdp-api logs. This token will be needed to Reset Password on http://${tenant}.stellar.local:3000/reset-password.

Create Your First Disbursement

Navigate to the frontend service by opening a browser and going to http://bluecorp.stellar.local:3000.

  • Click New Disbursement+ on the Dashboard screen.
  • Use Demo Wallet as your wallet and choose a verification method.
  • Upload a disbursement file. A sample file is available at ./dev/sample/sample-disbursement.csv. Make sure to update the invalid phone number before using it.
  • Finally, confirm the disbursement.

Log In

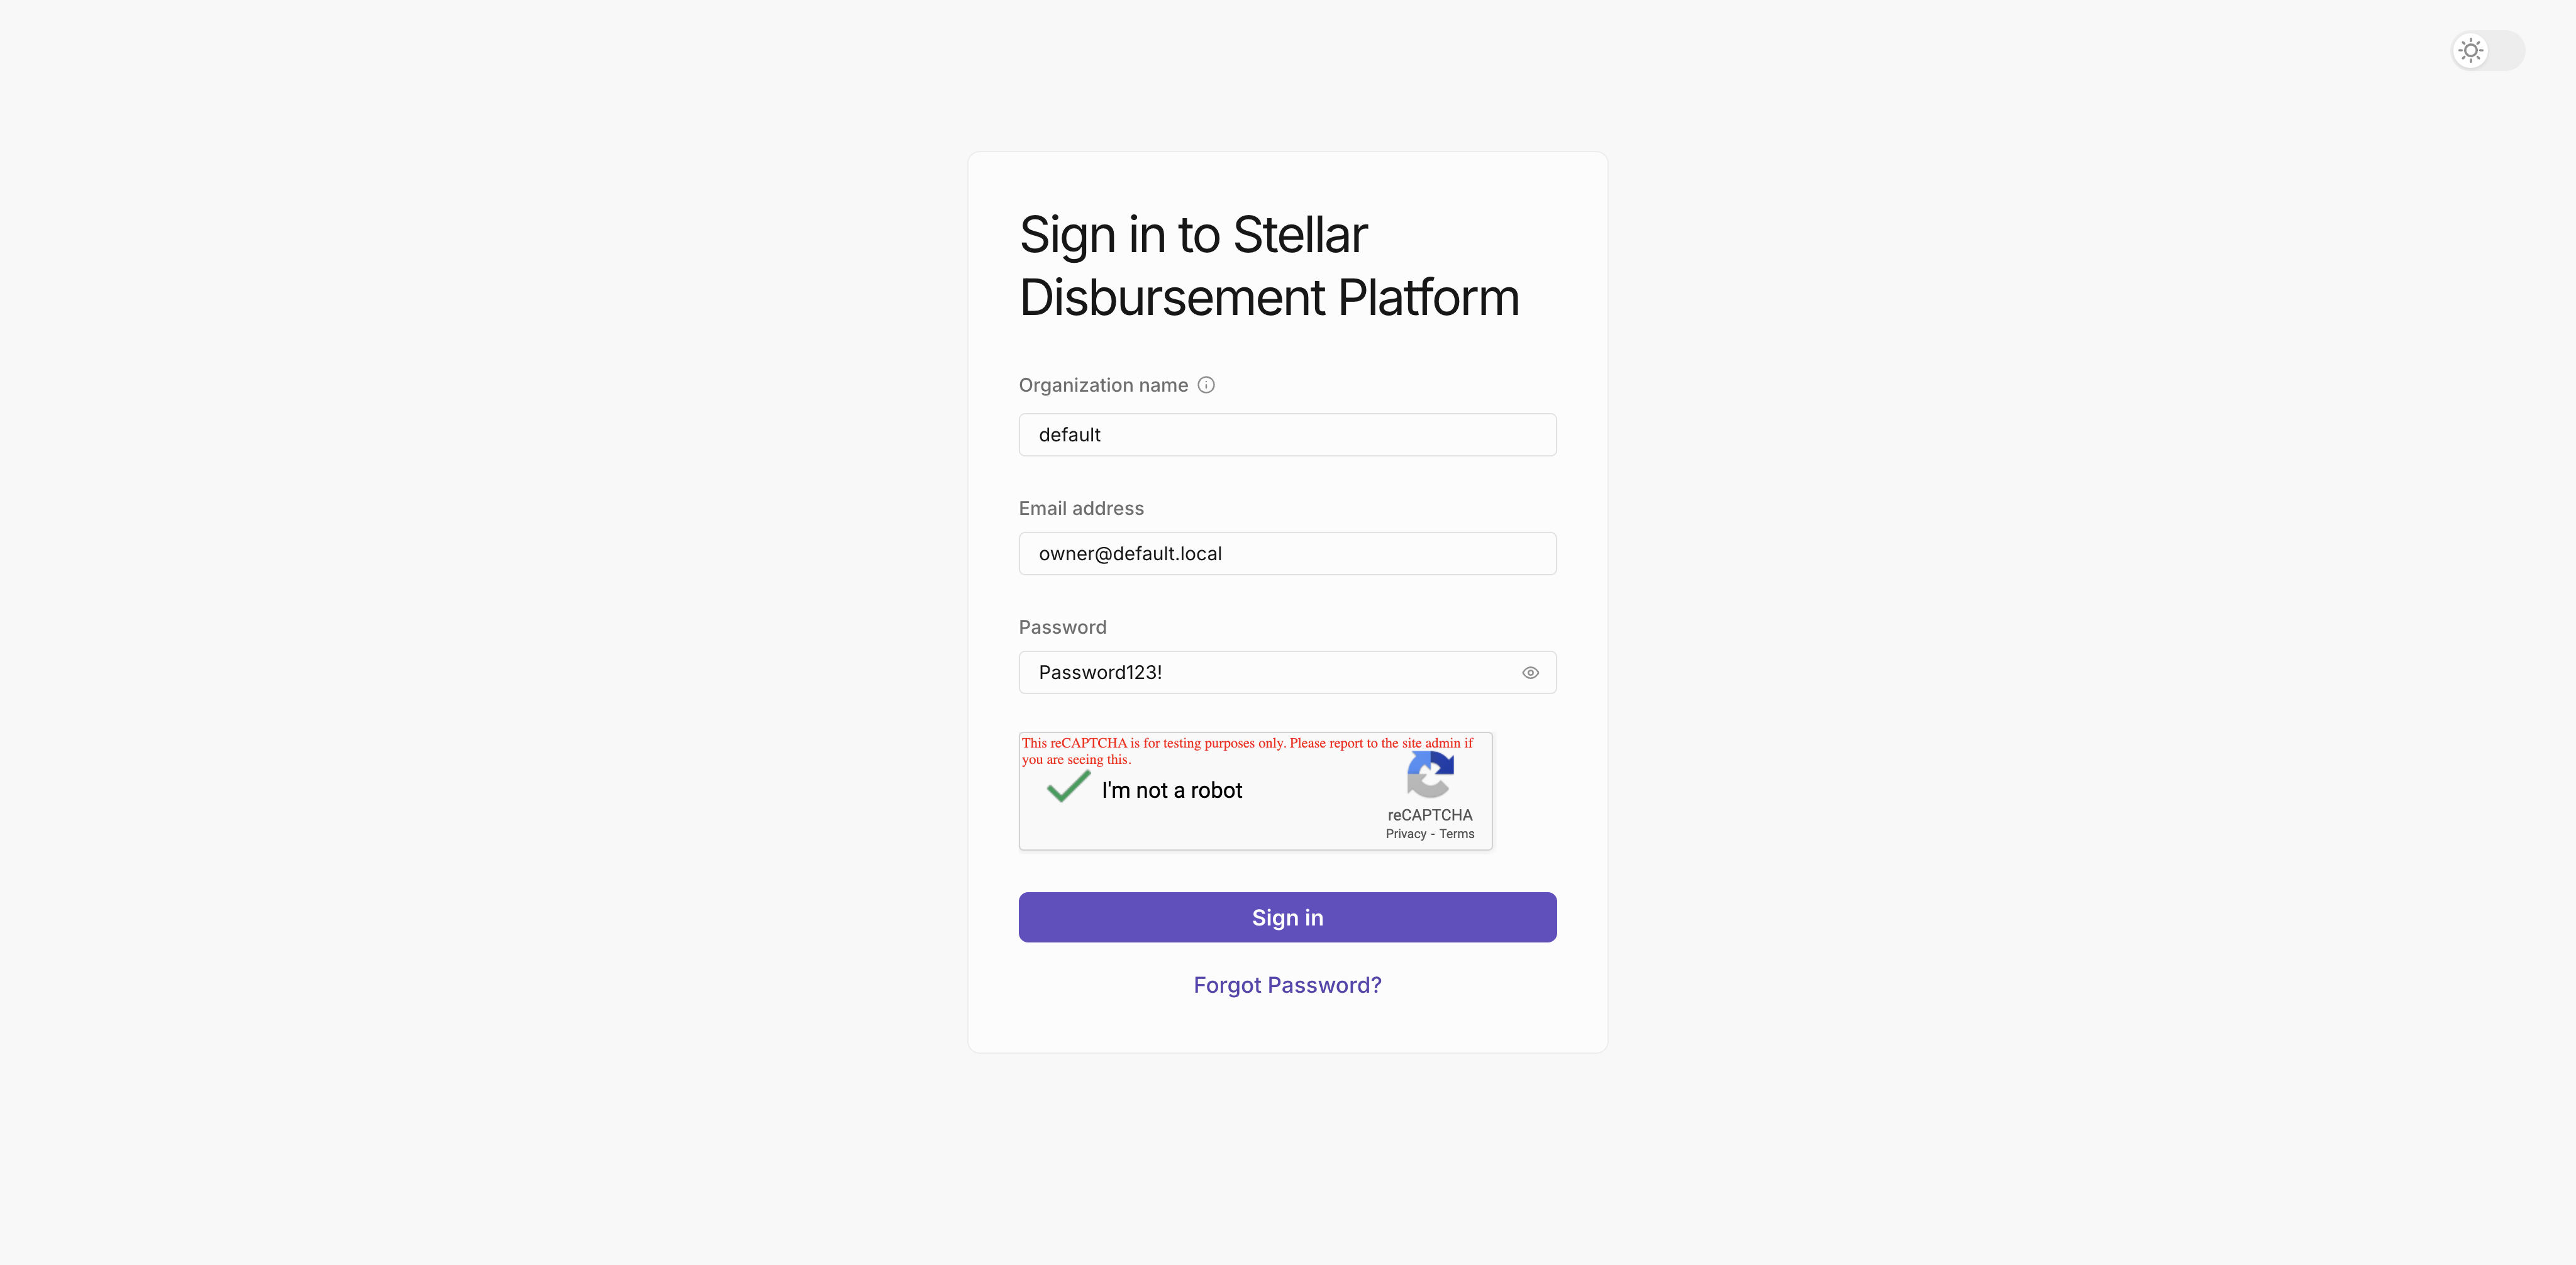
Once the password for your target org user has been reset to one of your choice, navigate to the dashboard by opening a browser to localhost:3000 and login with the user account. Login

Click the Sign in button and the SDP Dashboard will open. You will have no disbursements data at this point. Dashboard

Create Your First Disbursement

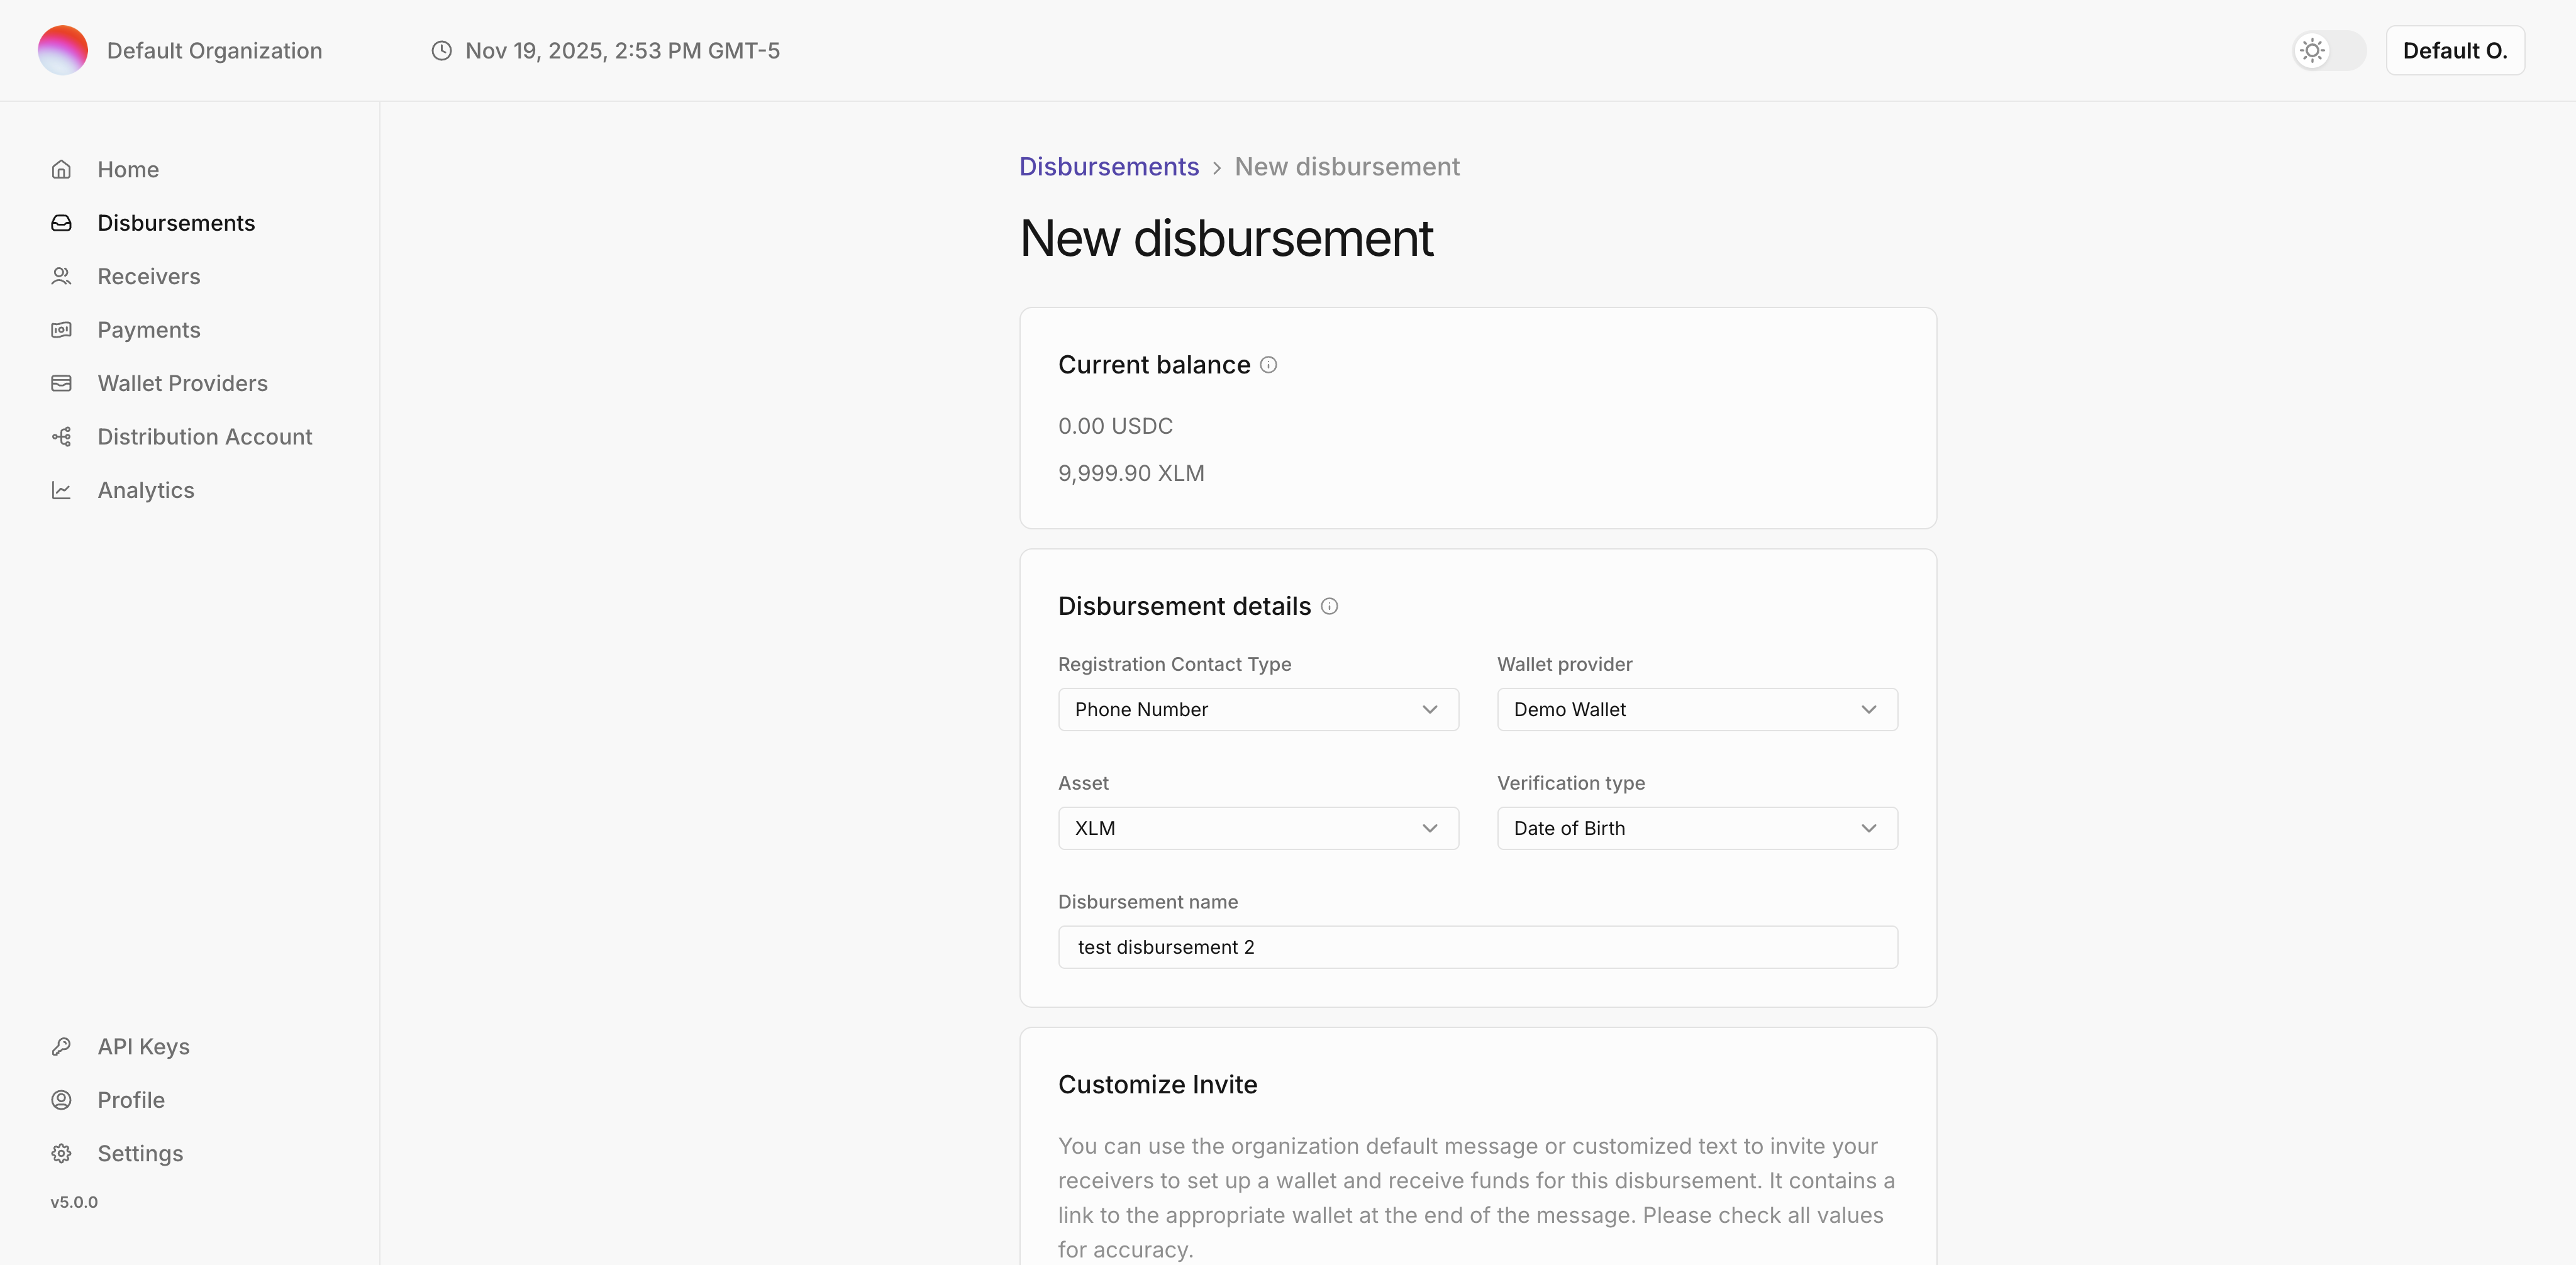
Create your first disbursement by clicking the New Disbursement button. Use Demo Wallet as your wallet and USDC as your asset. You can choose whatever values you like for Country and Name, but ensure that Verification type matches the type used in the disbursement file that you will then upload with receiver information. Refer to ./dev/sample/sample-disbursement.csv for the disbursement file template. Disbursement Details

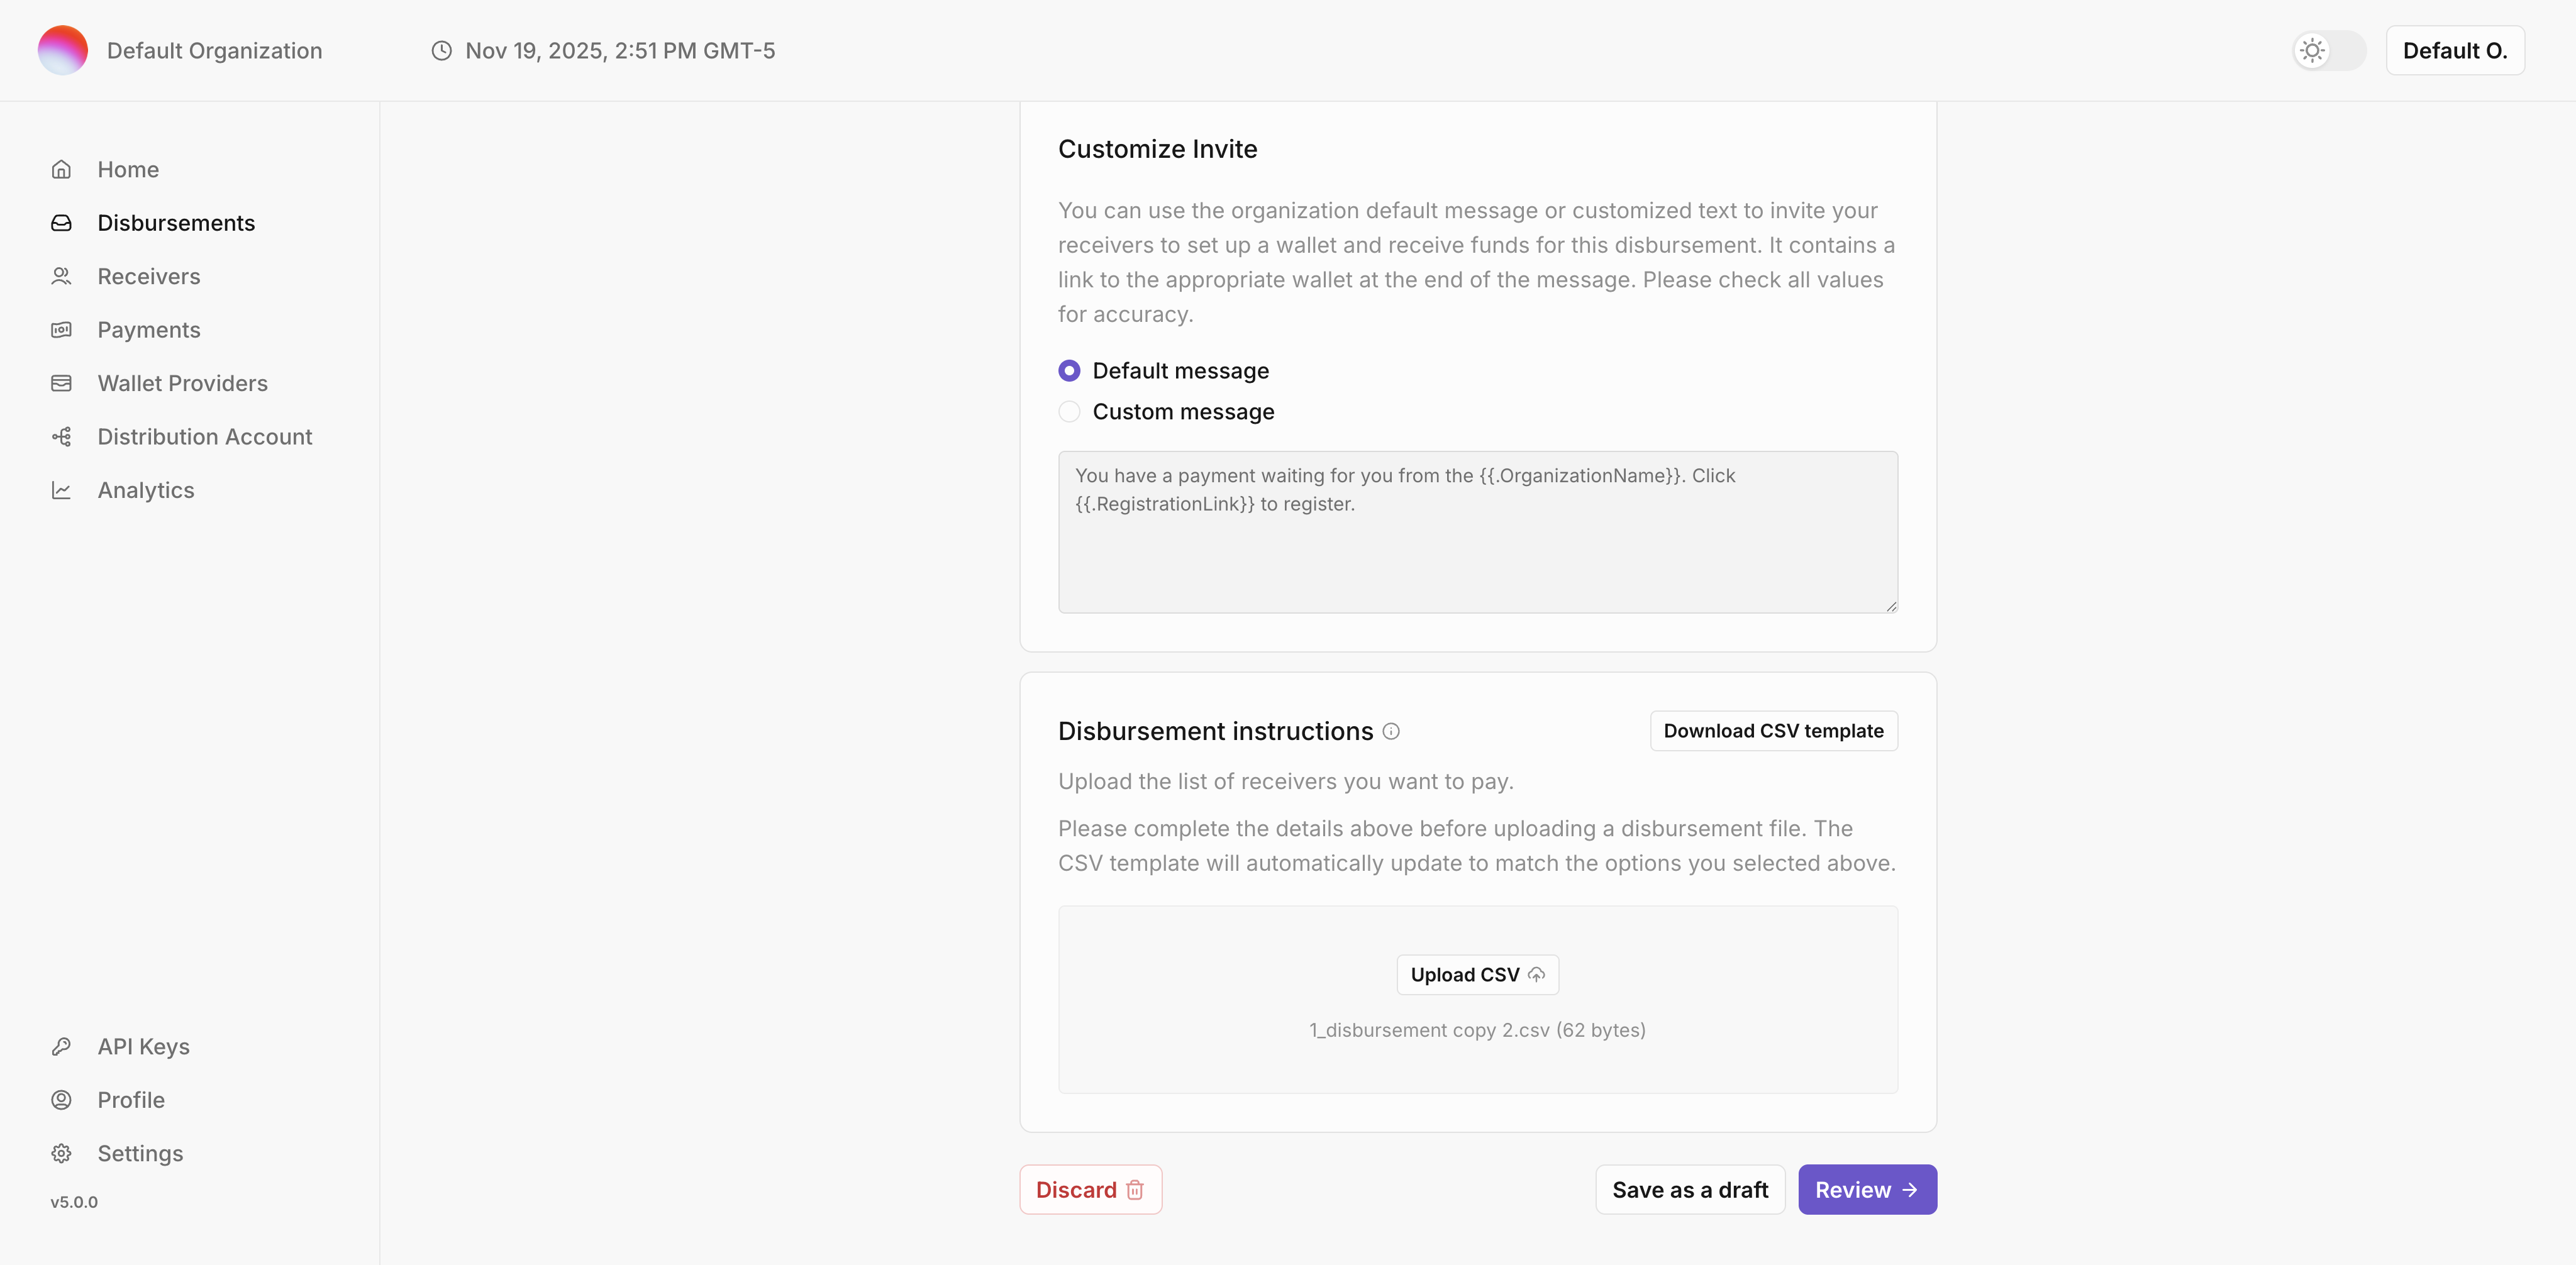
You also have the option of modifying the message in the receiver invite. Disbursment Details 2

Deposit Money

To deposit money into your account:

  • Access demo-wallet in your browser.
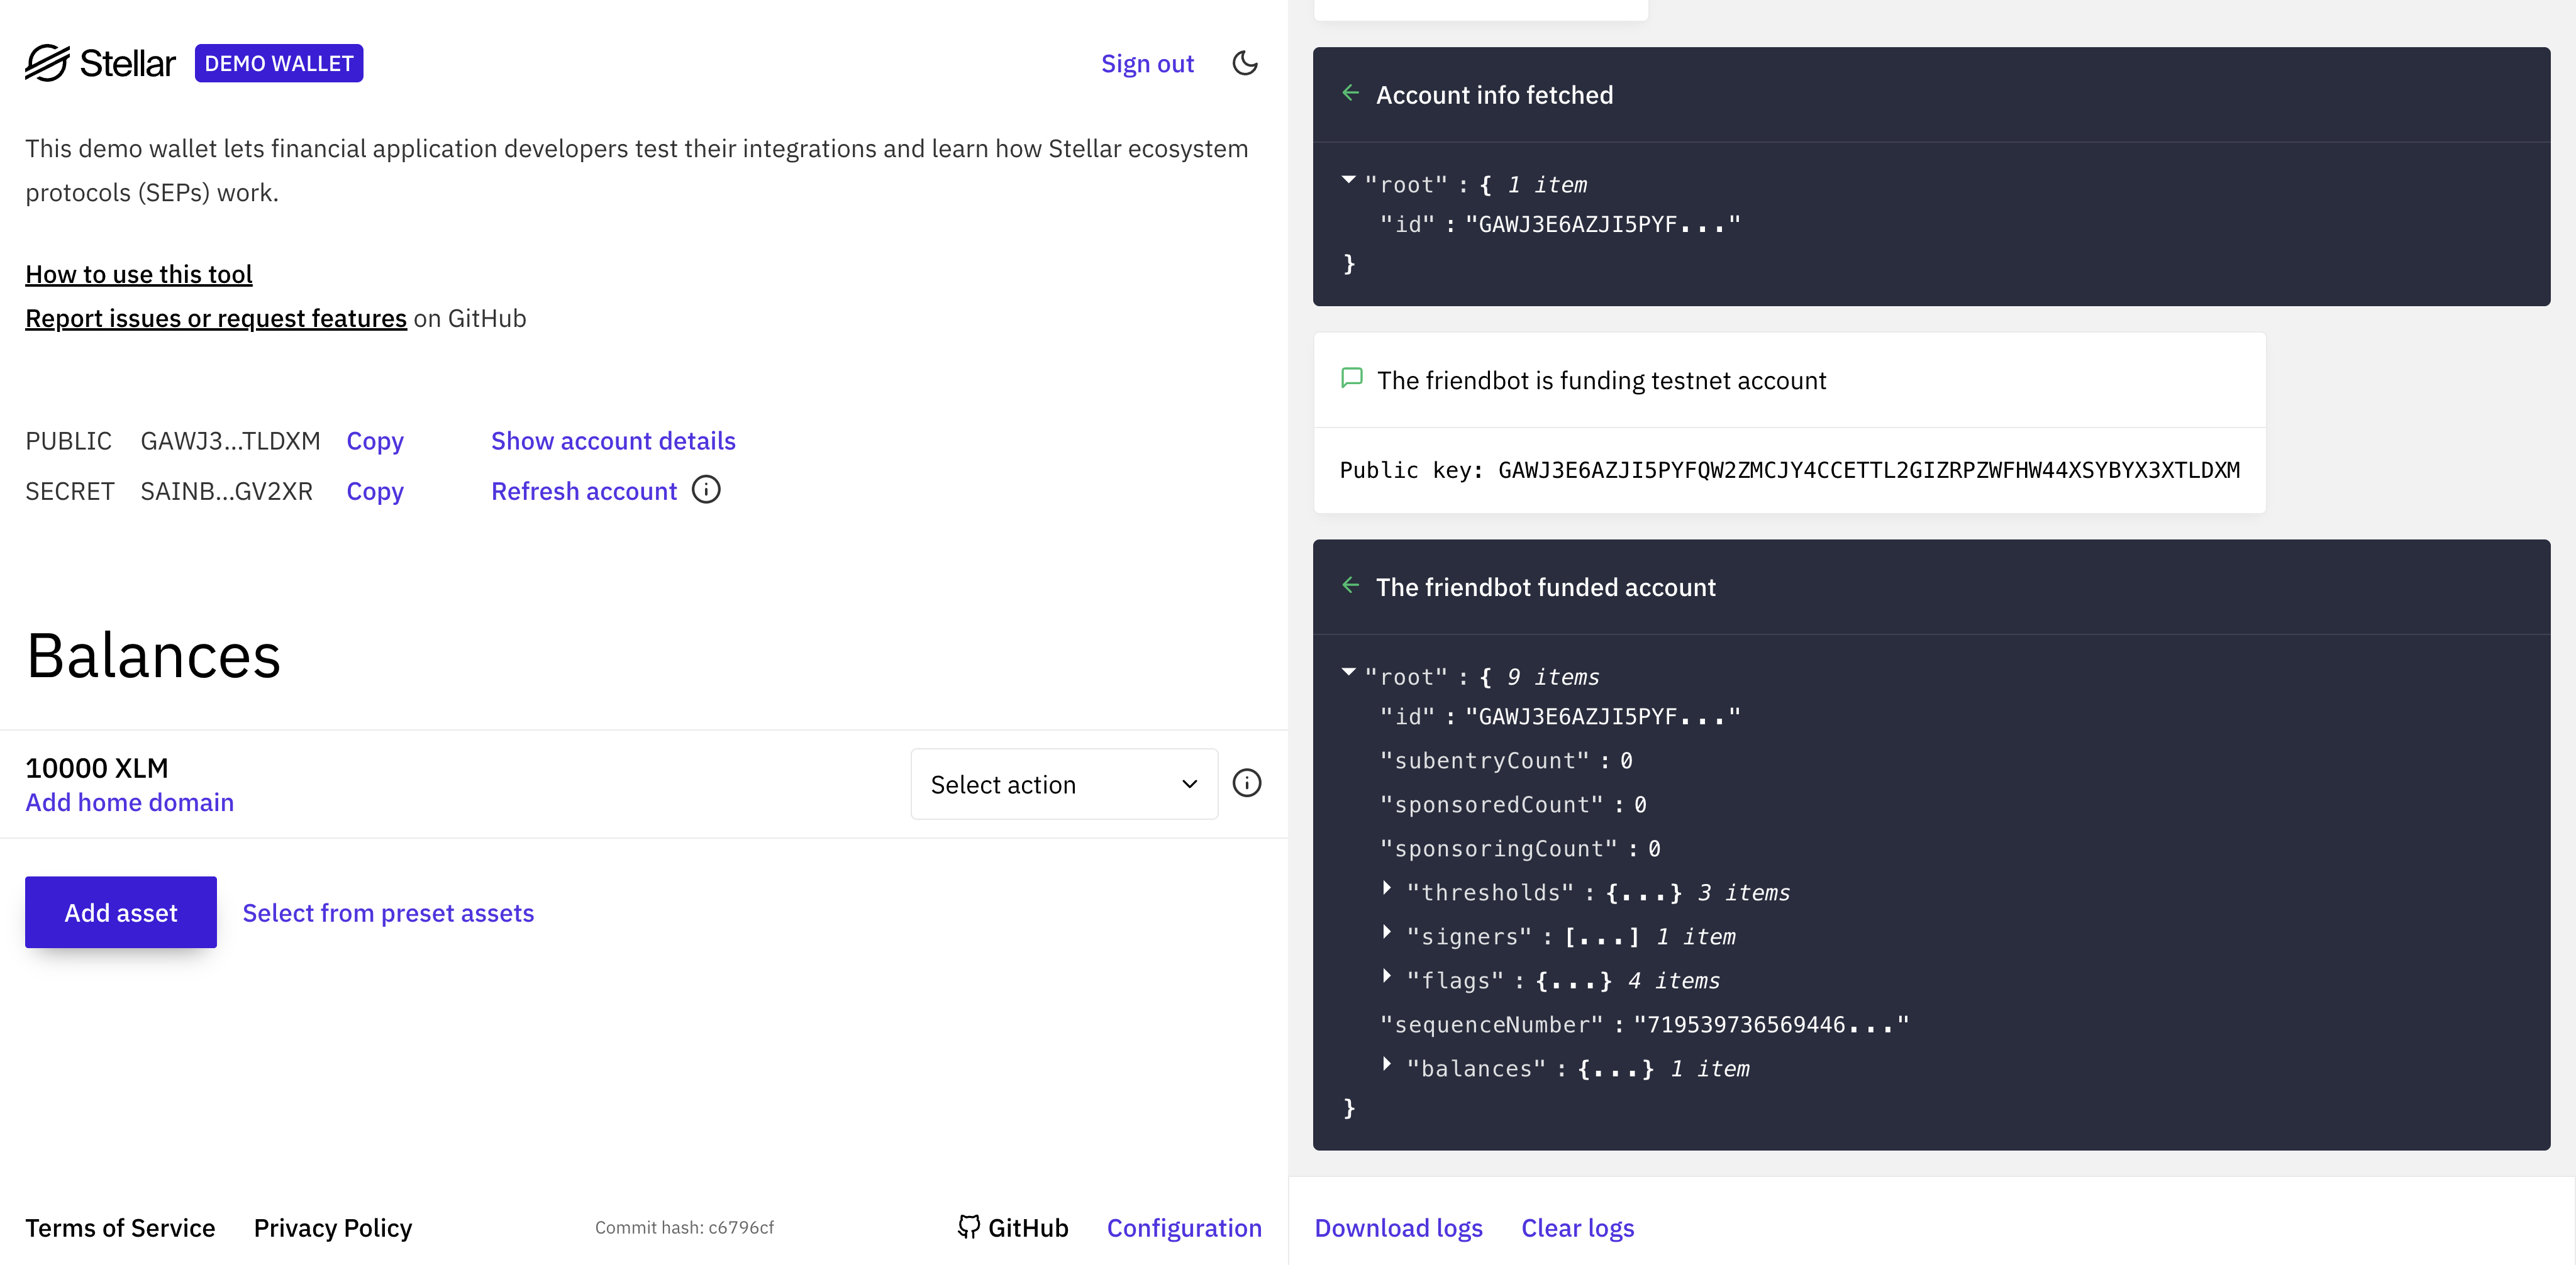
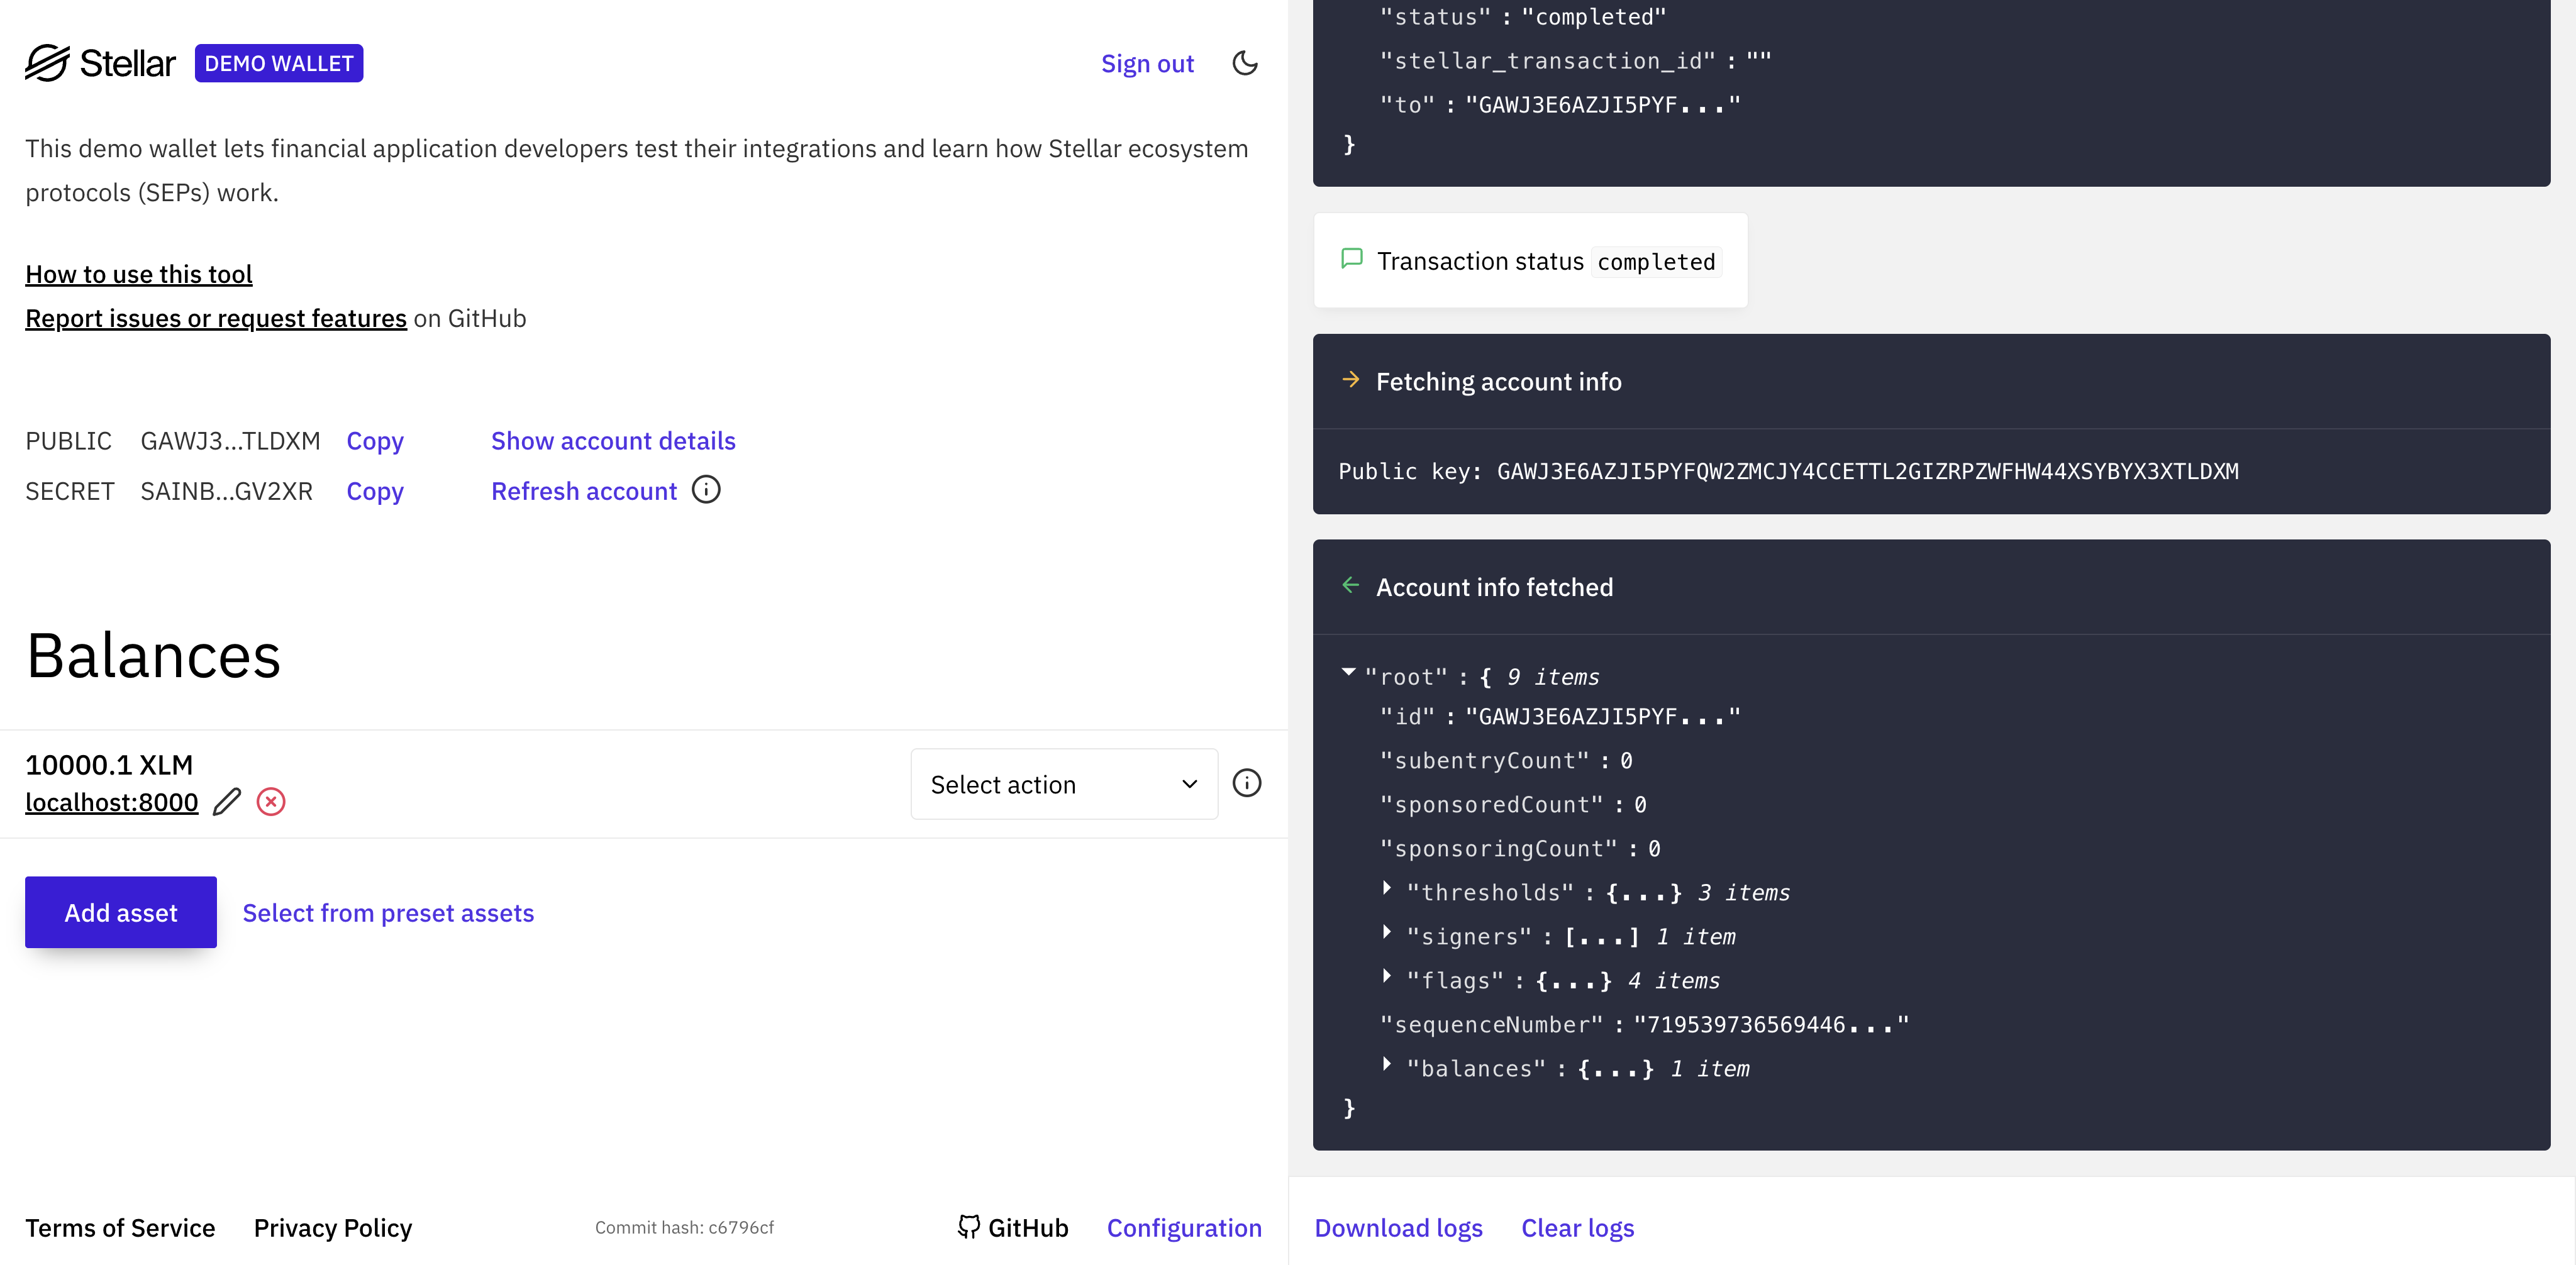
  • Click on Generate Keypair for new account to generate a new keypair. Make sure to save your public key & secret if you want to use this account later.
  • Click Create account (in front of public key) to actually create the account on the Stellar testnet.
  • Your newly created account will have 10,000 XLM.
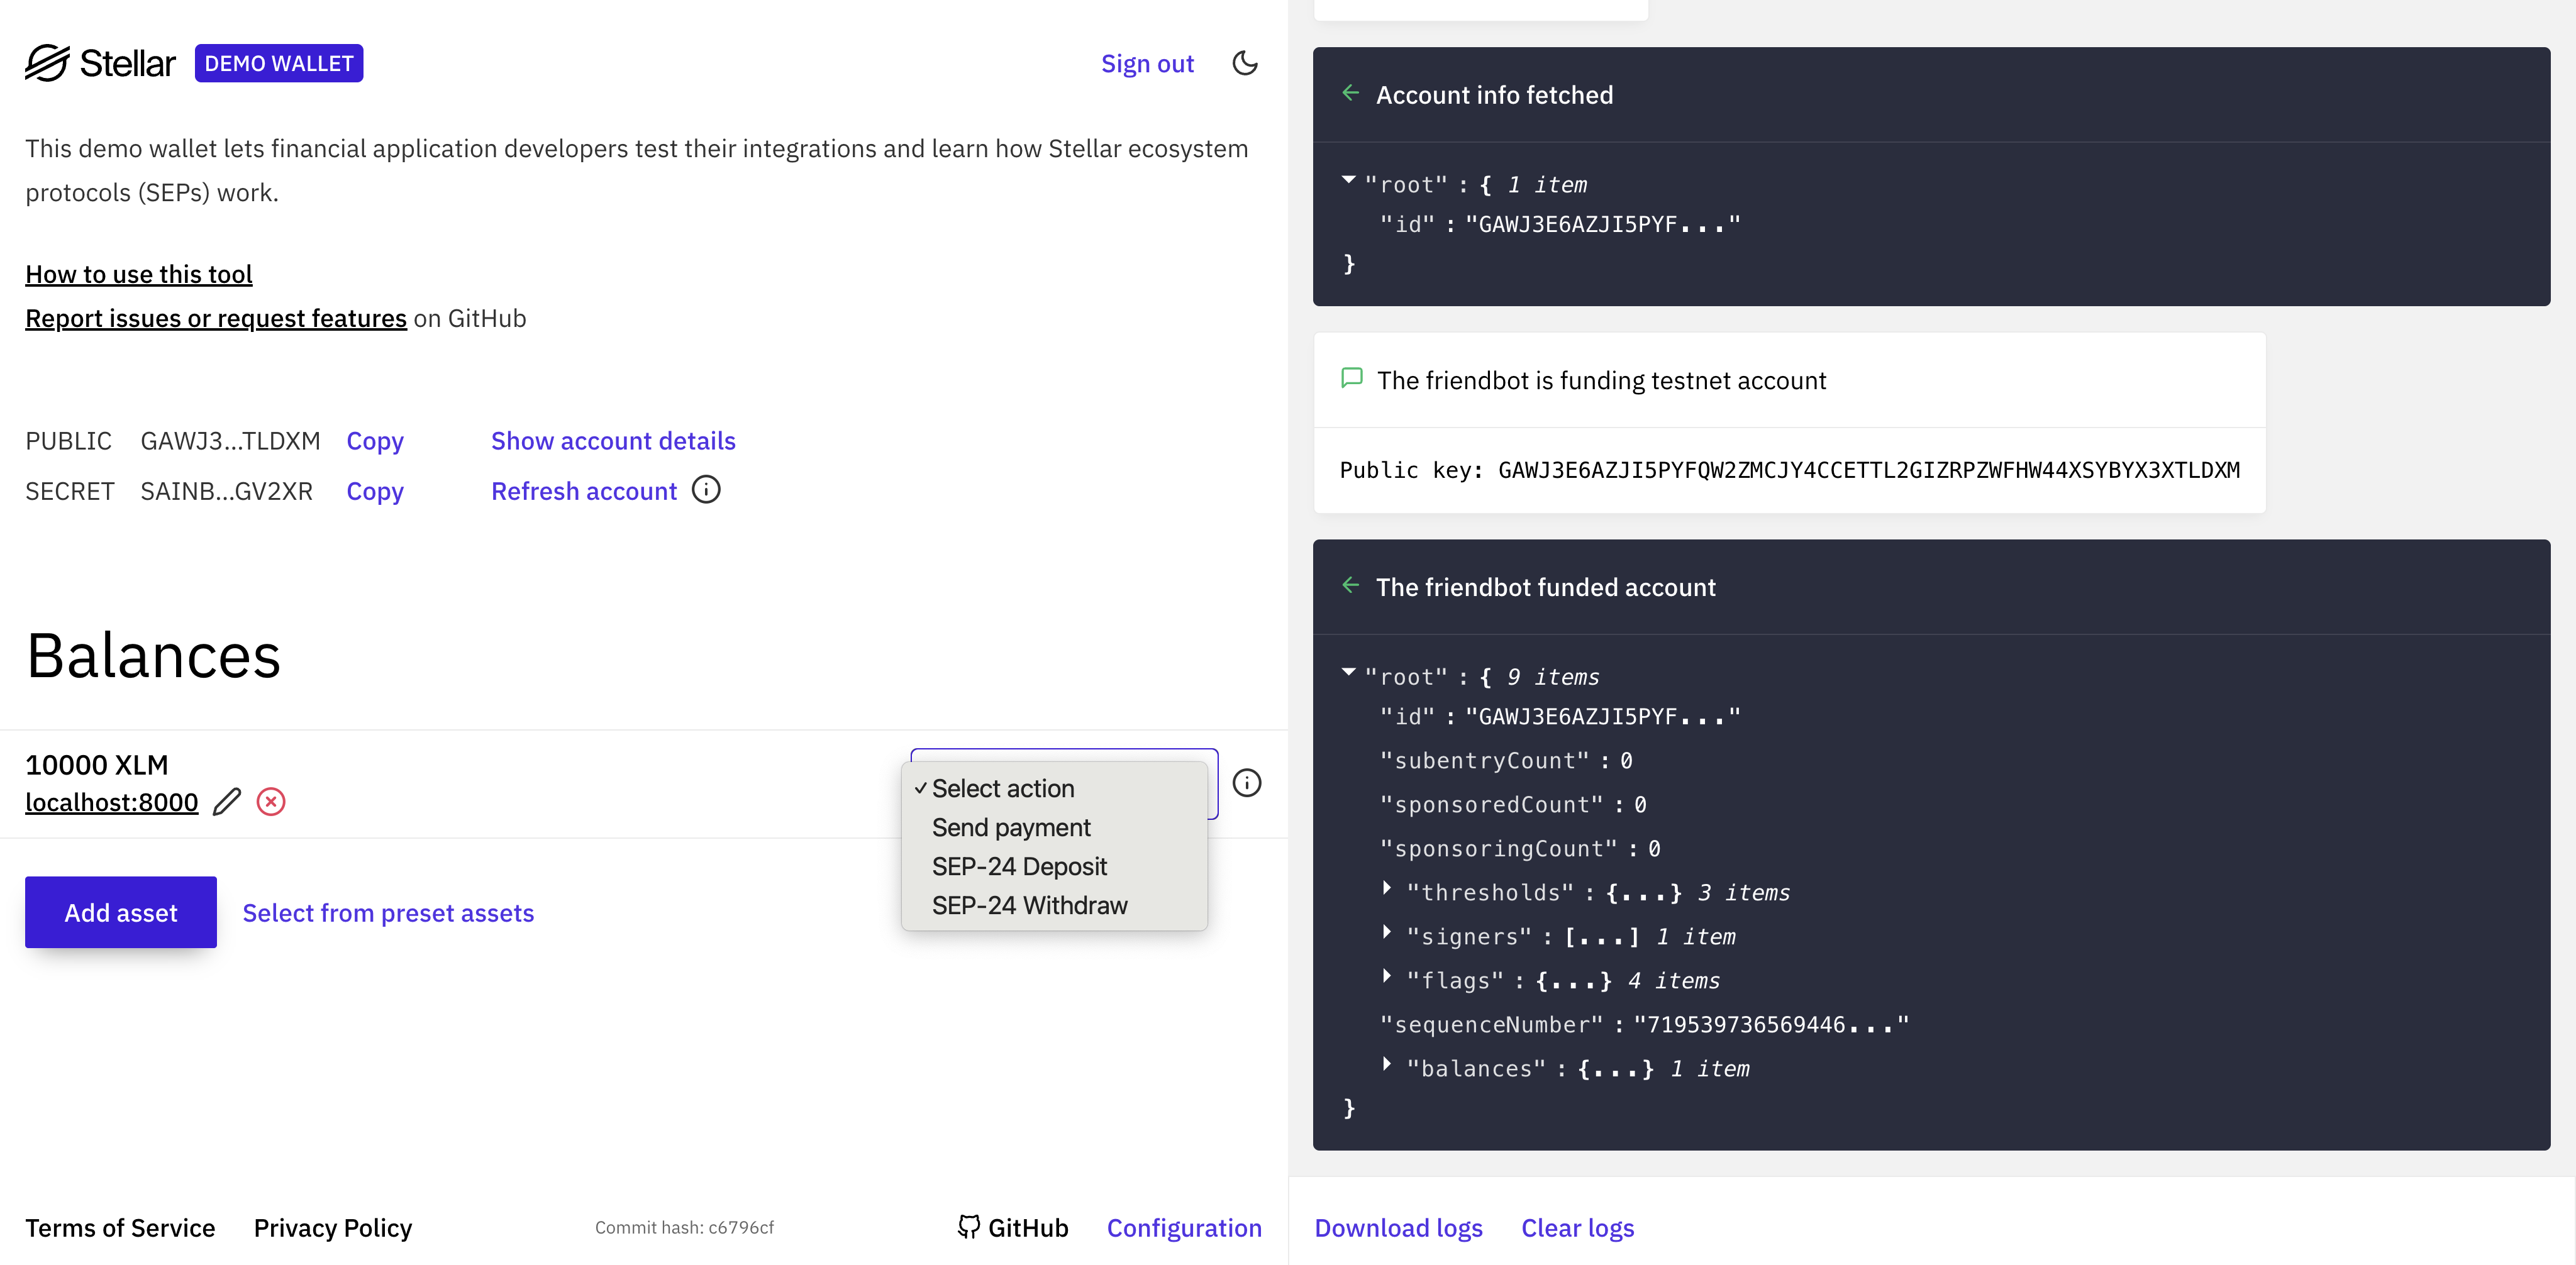
  • Add your home domain to the account by clicking on Add Home Domain and entering http://bluecorp.stellar.local:8000.
  • In the Select action dropdown, select SEP-24 Deposit.
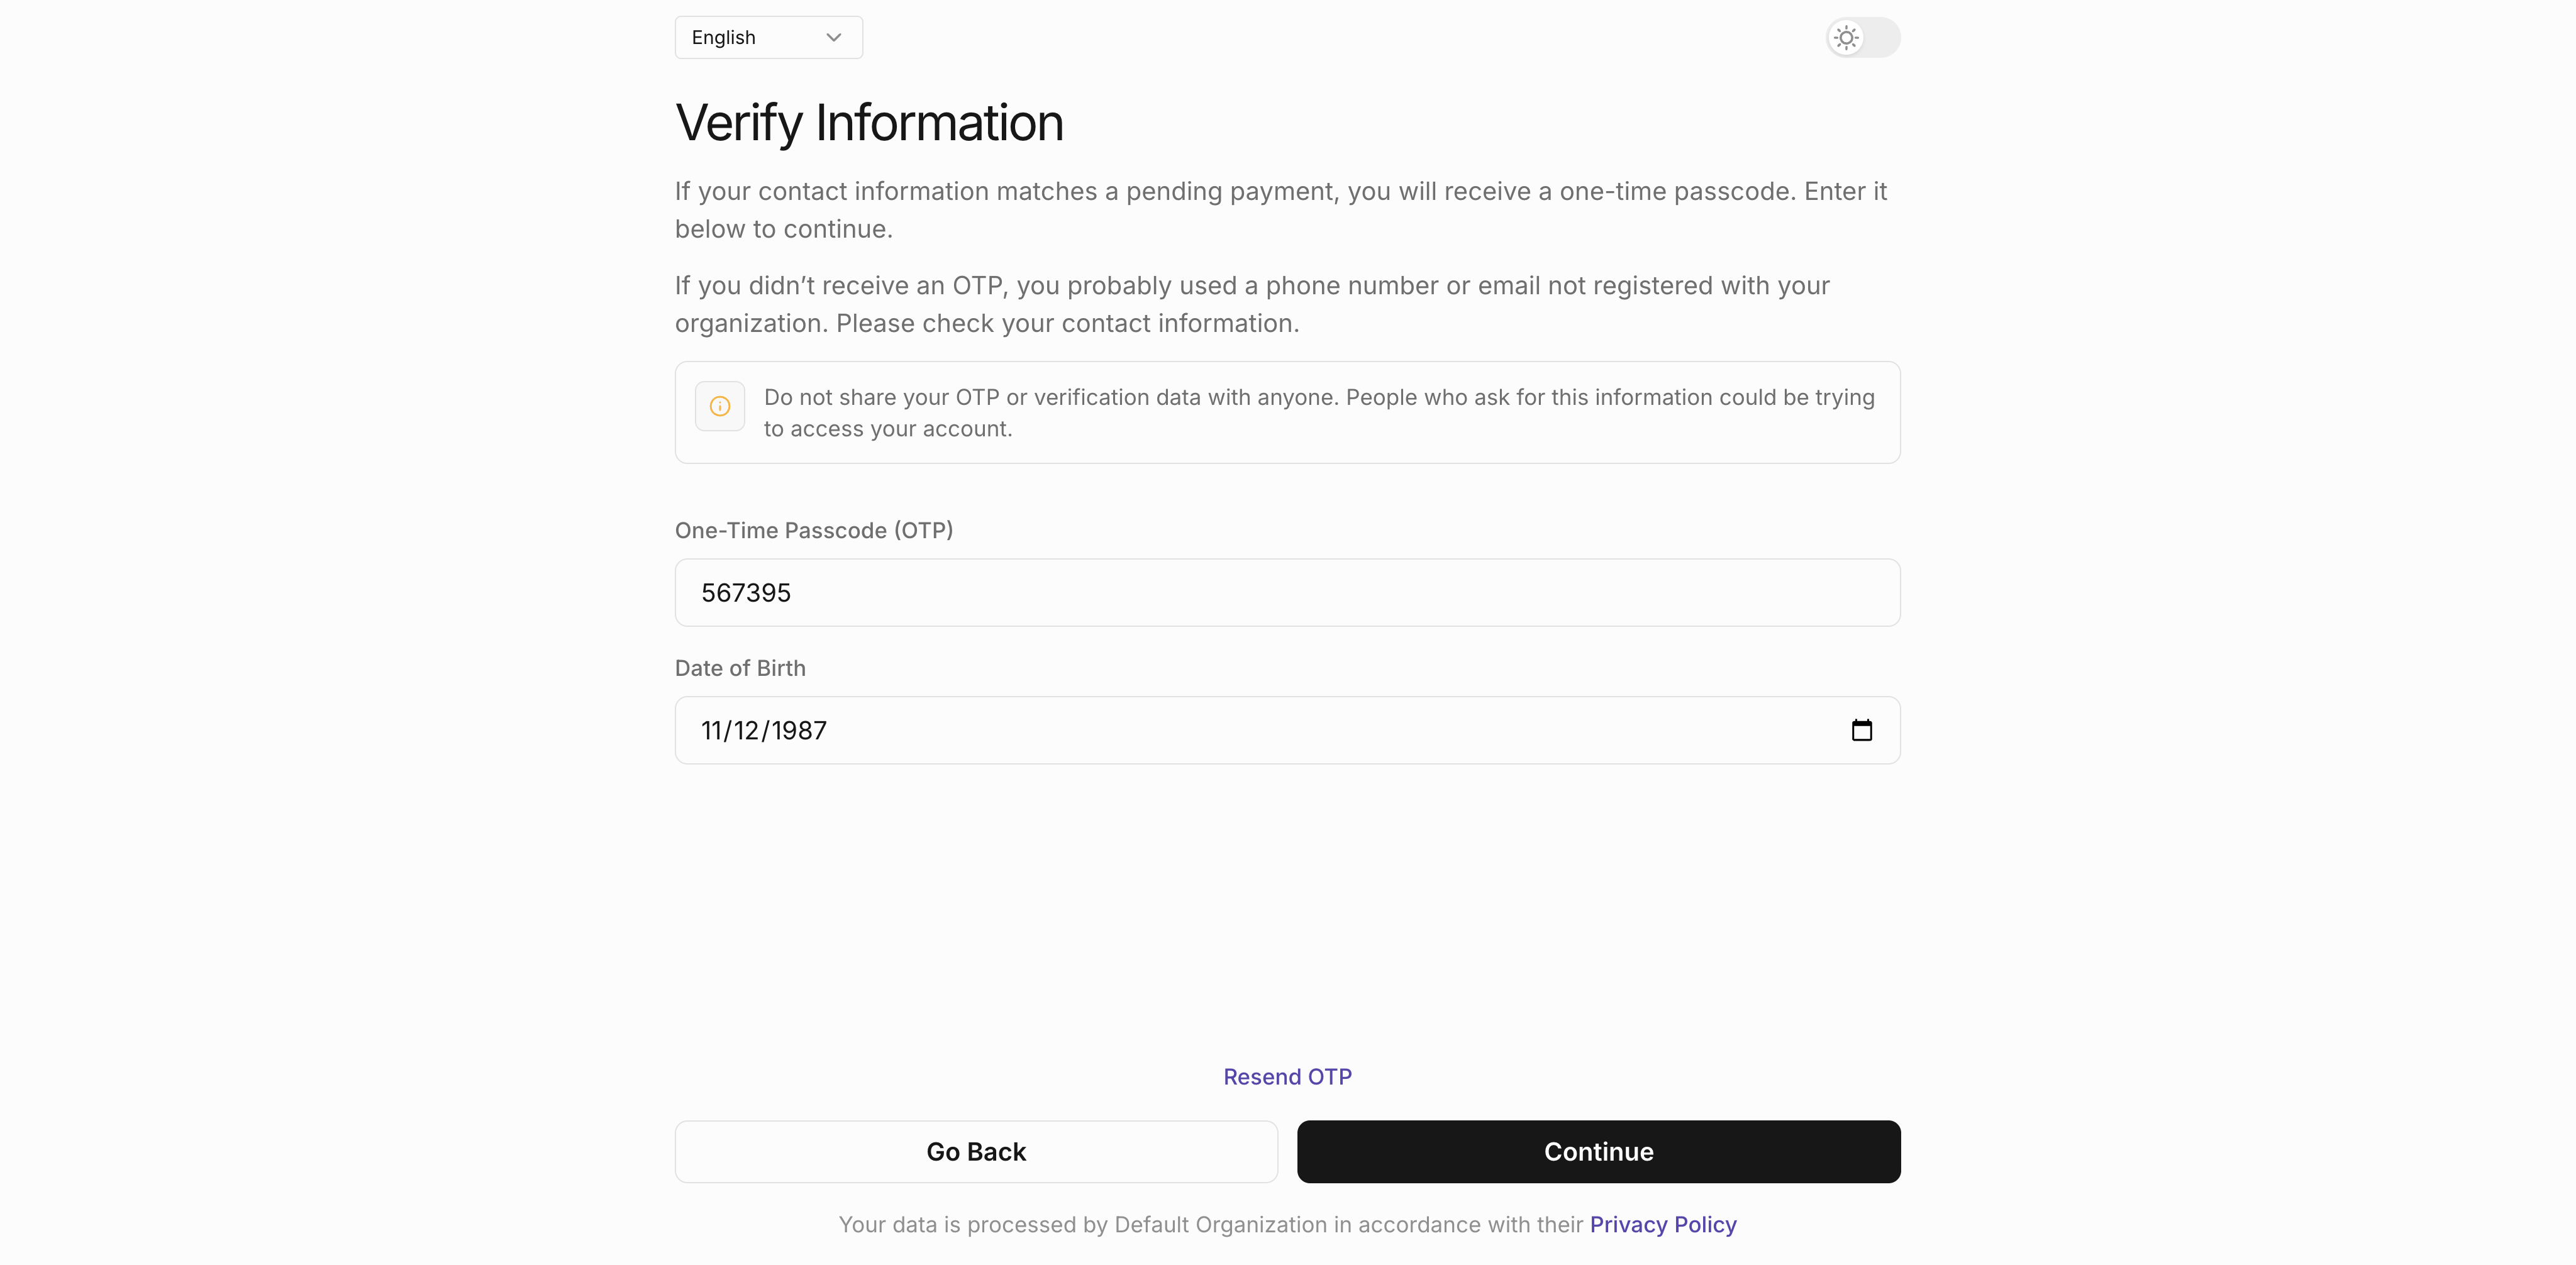
  • In the new window, enter the phone number from the disbursement CSV.
  • Enter the passcode. You can use 000000 passcode or find the actual passcode in the sdp-api container logs.
  • Enter the birthday that matches the phone number in the CSV.
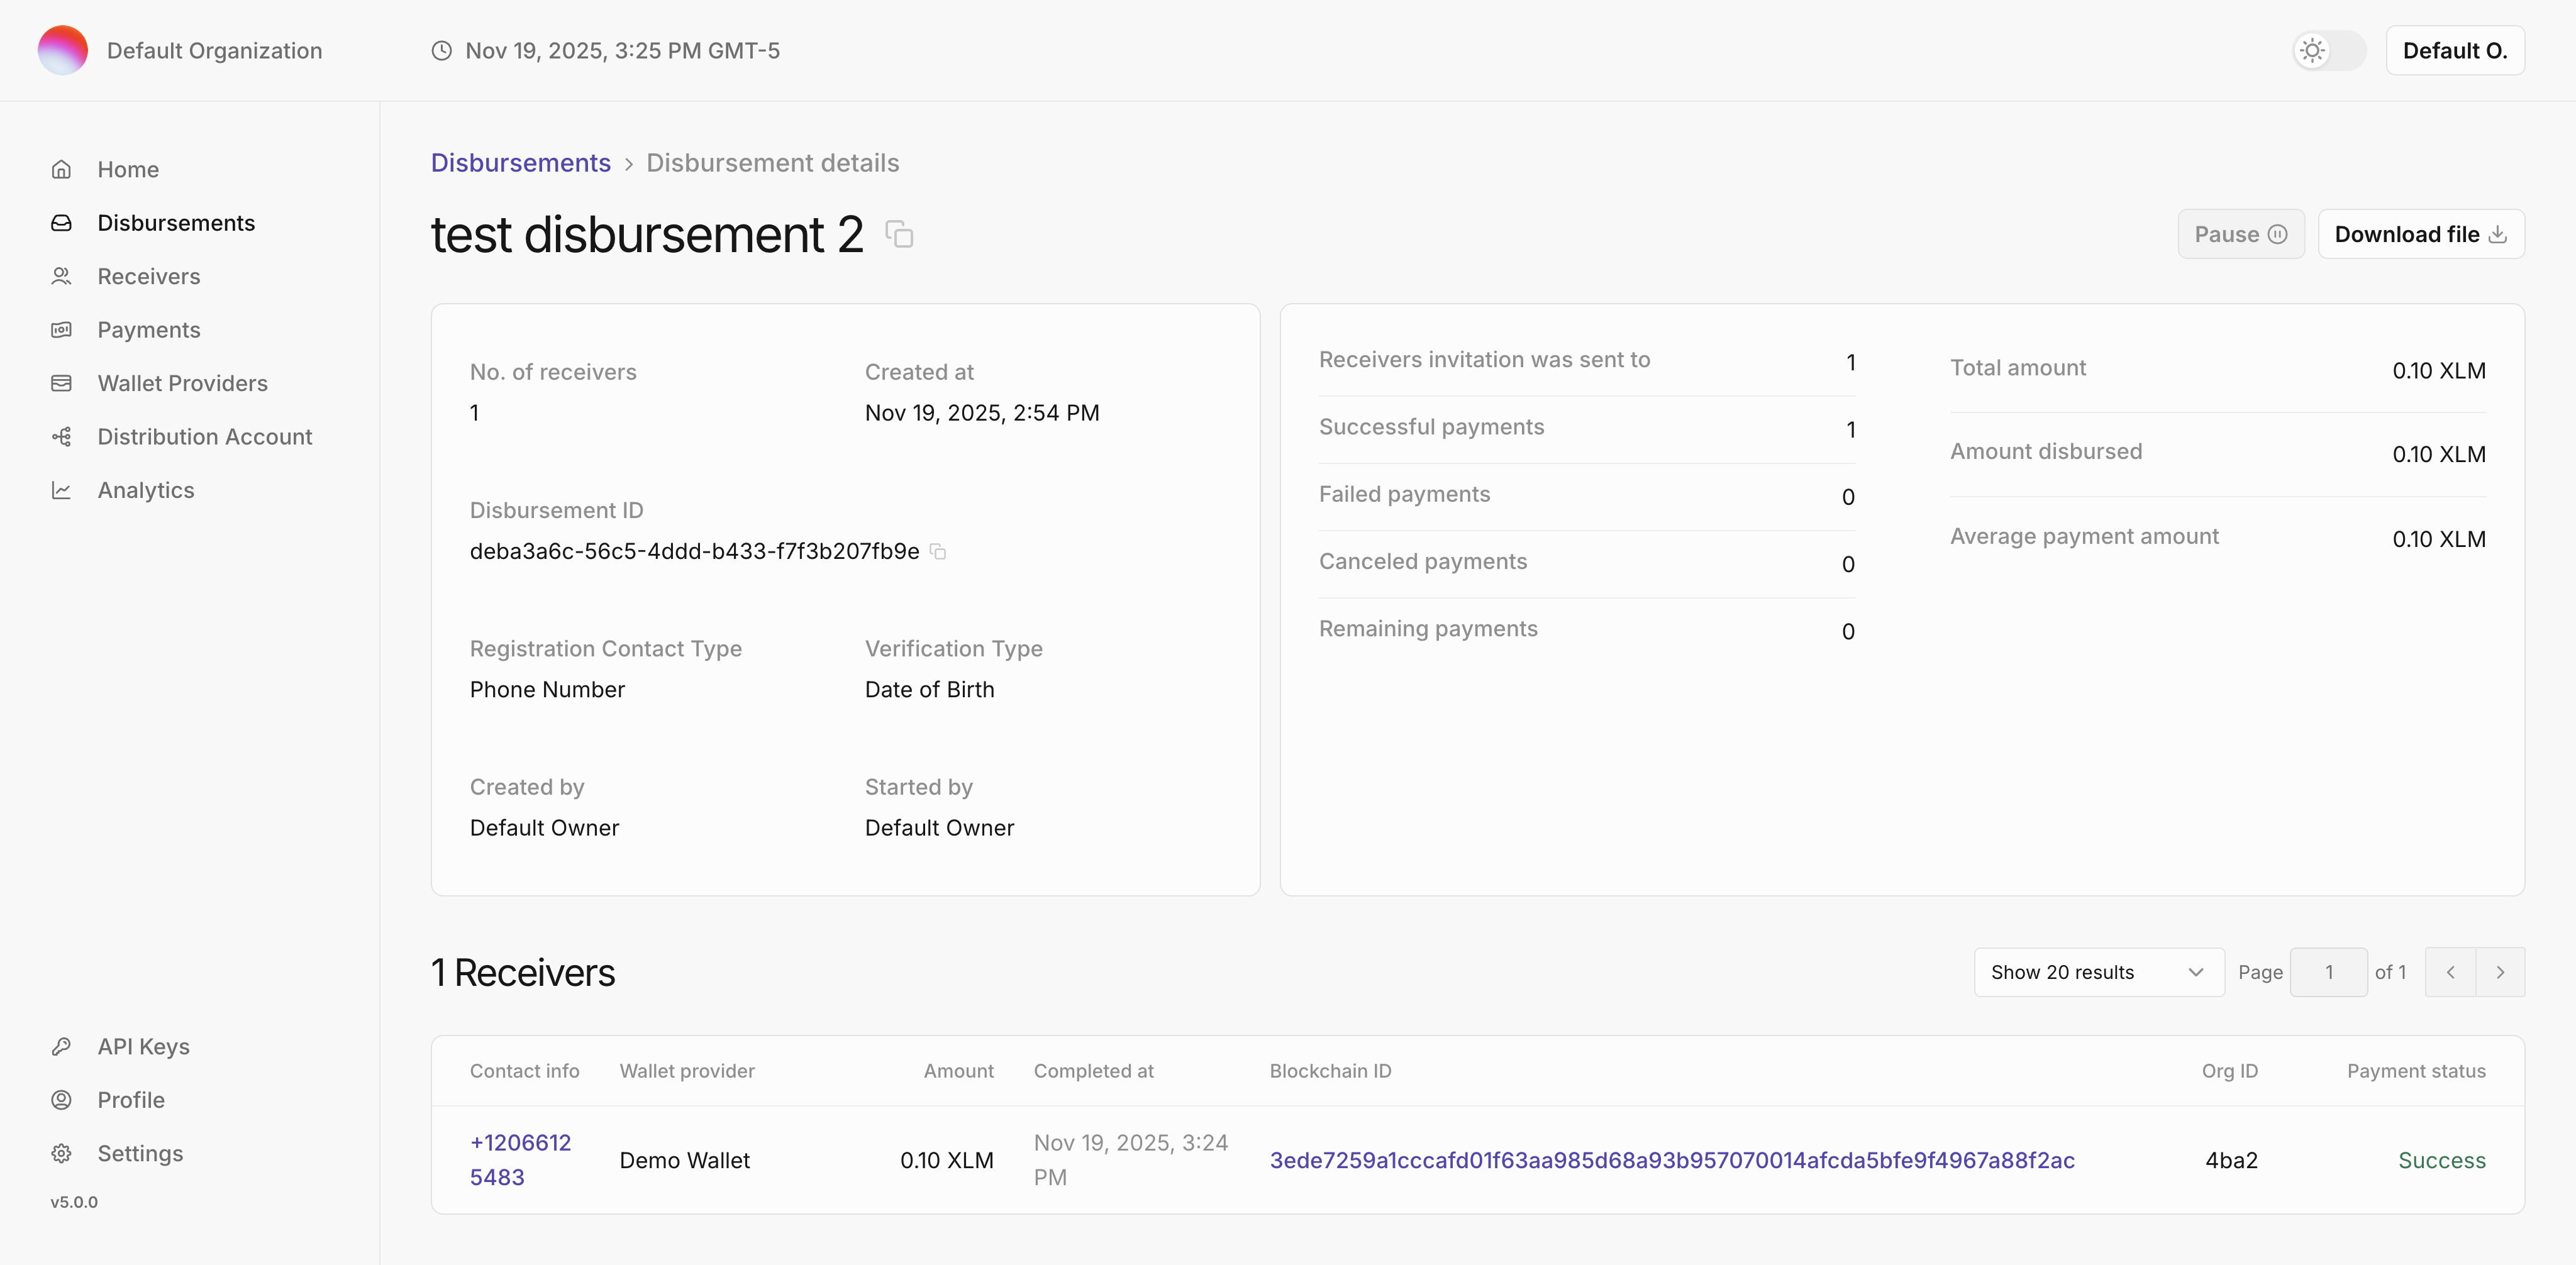
  • Keep an eye on the dashboard until the payment status reaches Success. If everything was set up correctly, your money should be disbursed successfully.

Troubleshooting

Distribution account out of funds

Payments will start failing if the distribution account runs out of funds. To fix this, you can either write a script that funds the distribution account or use the tools available to add more funds to the distribution account by following these steps:

  • The distribution account address can be found under Distribution Account on the frontend sidebar. Depending on the value of DISTRIBUTION_SIGNER_TYPE that's configured in dev/docker-compose.yml, this account may either be the host account or a new account that was created during the tenant provisioning process.
  • Access https://horizon-testnet.stellar.org/accounts/:accountId in your browser and check the balance.
  • If the balance is indeed low, you can add more funds by creating a new account and sending funds to the distribution account.
    • Access https://demo-wallet.stellar.org/ in your browser.
    • Click on Generate Keypair for new account to create a new testnet account. Your account comes with 10,000 XLM.
    • Click on Send and enter the distribution account public key and the amount you want to send.
    • Using Freighter or Stellar Laboratory, swap the XLM for USDC if you wish to test with USDC.

Verify Your Identity

When a disbursement is created, the SDP attempts to send SMS messages to receivers using either Twilio or AWS SNS. This message includes a link to the wallet application selected when creating the disbursement, and should direct the receiver to install the wallet app, go through the wallet's onboarding flow, and finally register with the SDP. However, neither service is configured by default, so the SDP will not send an SMS message to the phone numbers listed in the CSV uploaded in the previous step. You can still see the message in the sdp-api container logs.

Check out the Email and SMS Messages section to learn how to configure messaging in the SDP. When you do, and another disbursement is created, you should get a message like the following.

Verify Identity

Create a Receiver Account

Clicking on the link within the SMS message will bring you back to the Stellar Demo Wallet, where you'll need to create another account to receive the USDC. Follow the same process described earlier to create the account and add a USDC trustline.

Initiate SEP-24 Webflow

Now we'll need to connect the demo wallet to the SDP instance running locally. To do that, select the pencil icon next to "centre.io" below your USDC balance and enter "localhost:8080".

In the "Select Action" dropdown, select "SEP-24 Deposit" to initiate a SEP-24 webflow, which triggers the User Registration process to link the new wallet to the phone number in the SDP.

SEP-24

A SEP-24 interactive window will appear. This simulates the wallet application popup you would see on your mobile phone. Enter the phone number from the disbursement CSV.

Webflow

Next, enter the passcode and the verification field that you used in the disbursement file. Note: use 000000 for this example (or 999999 if you want to see an error response).

Passcode and Birthday

The webflow provides a message indicating your successful registration, which is the trigger for the SDP to send the payment. You should receive your payment from the SDP shortly.

Message

Check Your Balance

Refresh your account. The Demo Wallet should now show a balance of 2 USDC sent from the SDP (or however much was defined in the CSV file).

Success

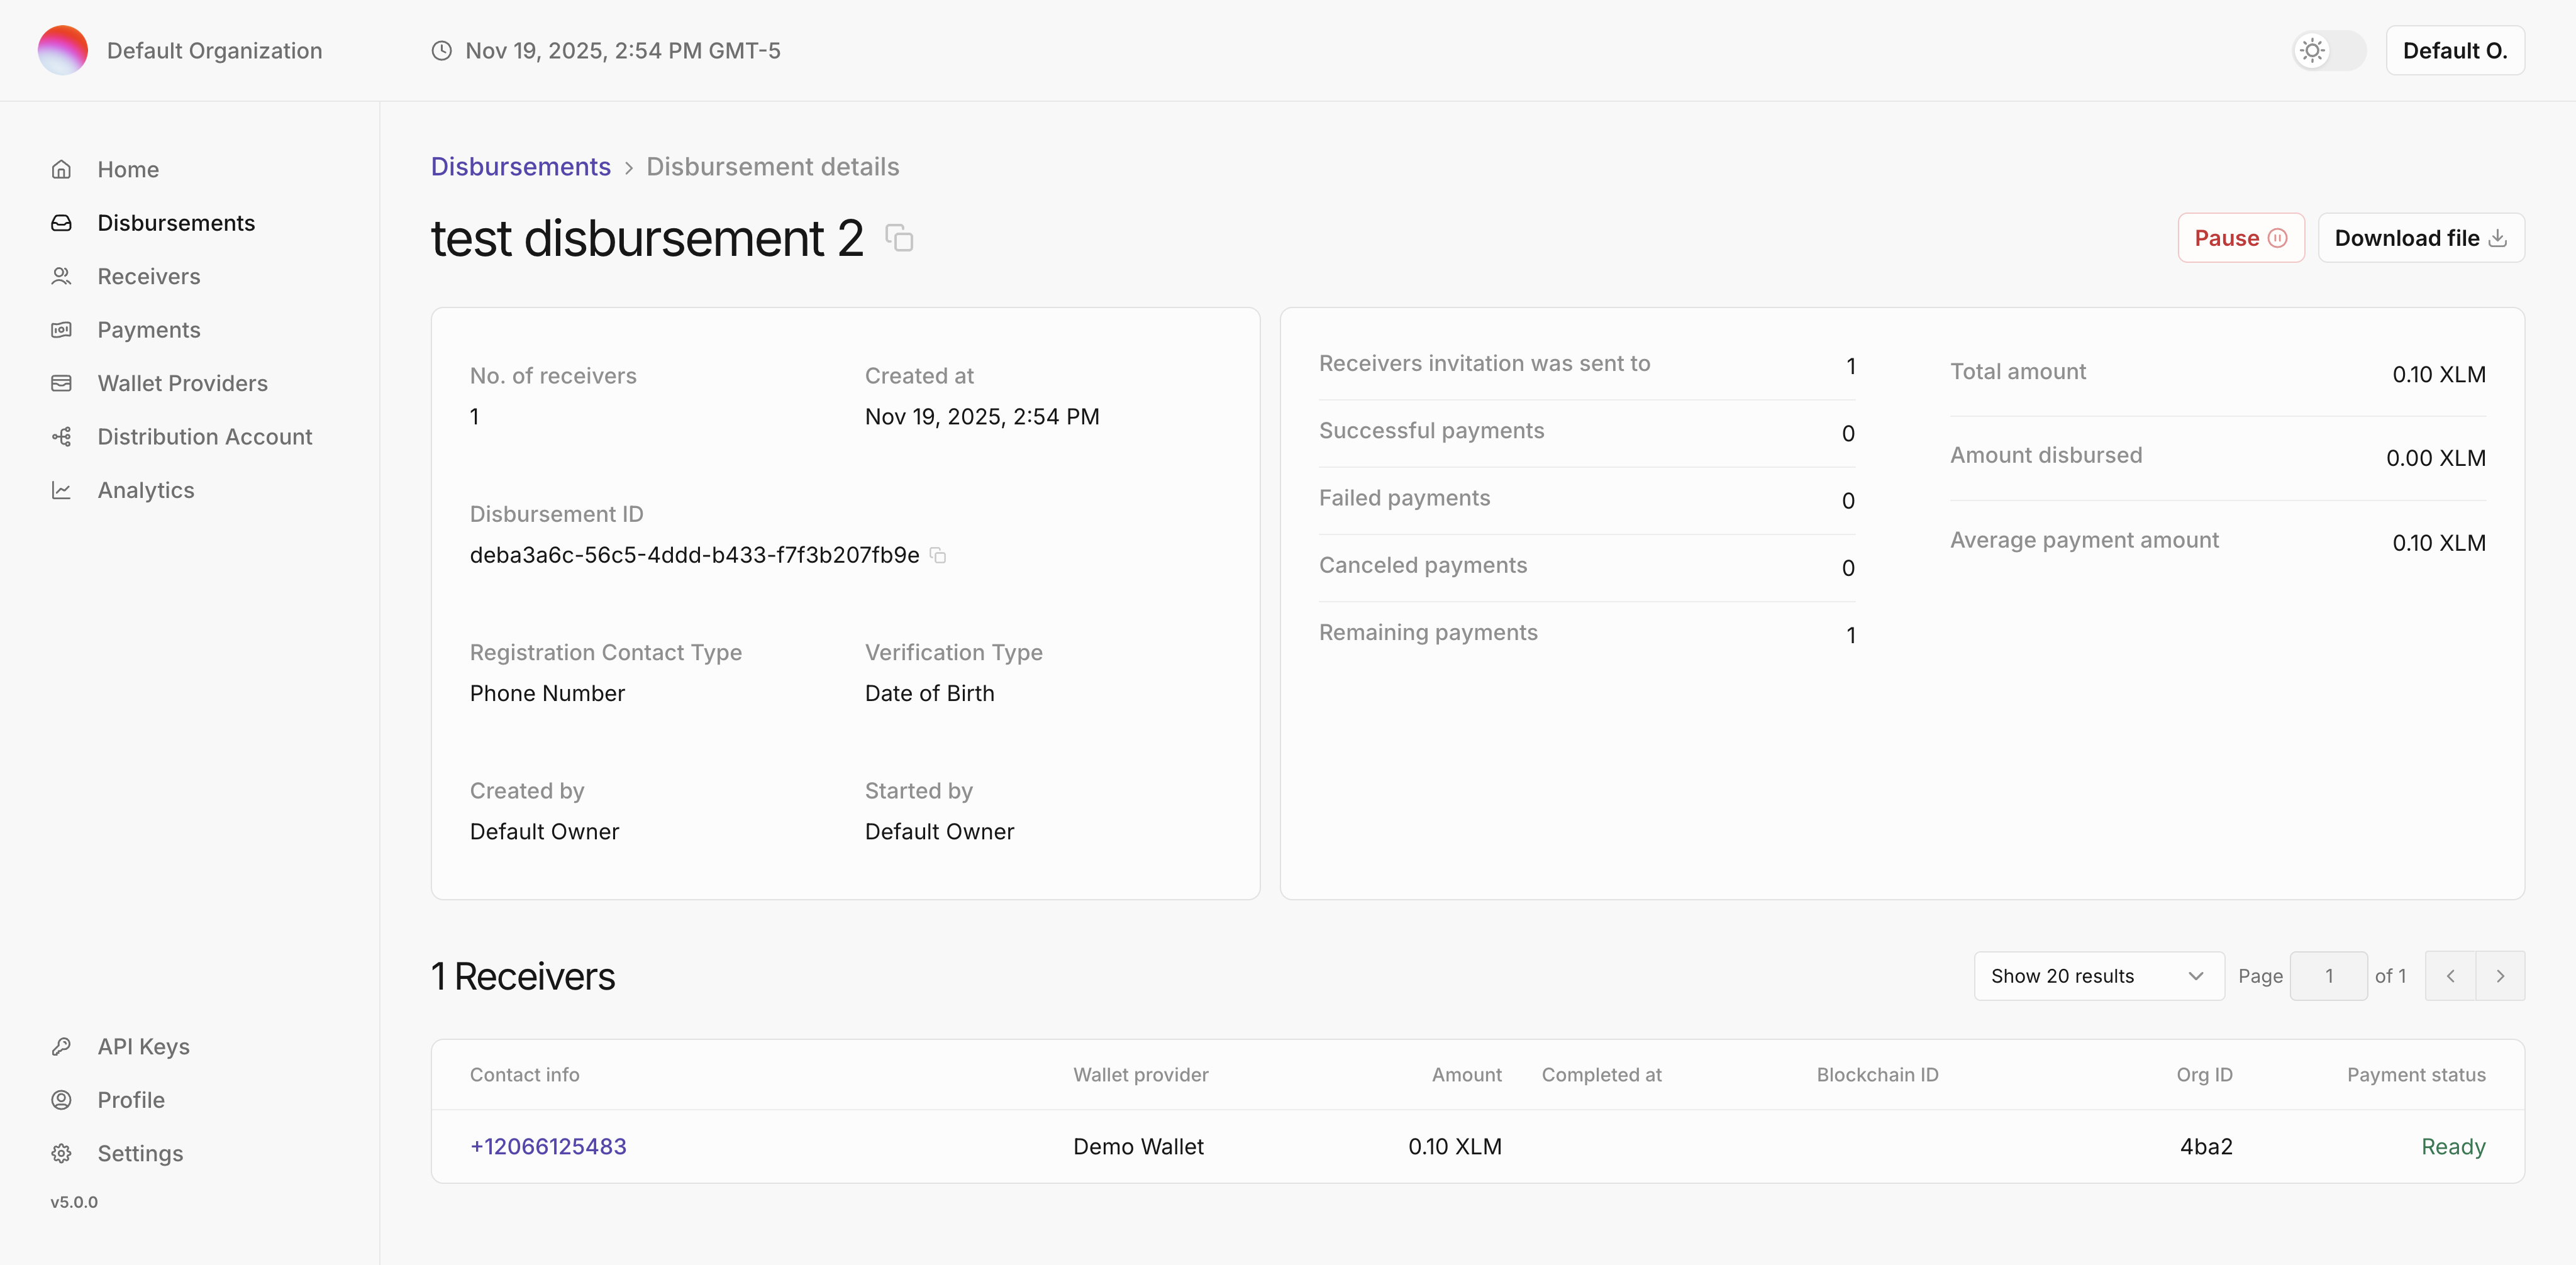
Keep an eye on the dashboard until the payment status reaches Success. If everything was set up correctly, your money should be disbursed successfully.

Disbursement

Next Up: Updating Application Secrets

Now that you've been able to make a disbursement, let's go back to our docker compose files and update some values. This is an important step before going to production. We'll be updating encryption keys and application secrets.

Email and SMS Messages

The Stellar Disbursement Platform sends SMS messages and emails to receivers and users, respectively. For SMS messages, the Stellar Disbursement Platform supports Twilio, AWS SNS, and a dry run mode that just logs the messages. For emails, it supports AWS SES and dry run.

These services can be selected through the SMS_SENDER_TYPE and EMAIL_SENDER_TYPE configurations. When selecting Twilio or AWS services, you'll need to fill their service-specific configuration as well. Here are some example configurations. You can mix and match the services as you see fit.

Dry Run Configuration

Dry run mode is useful for testing the SDP without sending real messages. It will log the messages to the console instead of sending them to the receiver. This is the default configuration and it works for both SMS and Email.

EMAIL_SENDER_TYPE: DRY_RUN
SMS_SENDER_TYPE: DRY_RUN

Twilio SMS Configuration

SMS_SENDER_TYPE: TWILIO_SMS

# Twilio specific configuration
TWILIO_ACCOUNT_SID:
TWILIO_AUTH_TOKEN:
TWILIO_SERVICE_SID:

AWS SMS Configuration

SMS_SENDER_TYPE: AWS_SMS

# AWS specific configuration.
# This is needed for both AWS Email and SMS
AWS_ACCESS_KEY_ID:
AWS_REGION:
AWS_SECRET_ACCESS_KEY:

# AWS SNS configuration
AWS_SNS_SENDER_ID:

AWS Email Configuration

EMAIL_SENDER_TYPE: AWS_EMAIL

# AWS specific configuration.
# This is needed for both AWS Email and SMS
AWS_ACCESS_KEY_ID:
AWS_REGION:
AWS_SECRET_ACCESS_KEY:

# AWS SNS configuration
AWS_SES_SENDER_ID:

Authentication

Wallets authenticate with the Stellar Disbursement Platform using a mutual authentication protocol, where both the SDP and wallet prove they are in possession of their Stellar accounts by signing a payload exchanged between themselves. Once this process is complete, a JWT is provided to the wallet to use in future requests. Additionally, the SDP's microservices uses authentication tokens to communicate between themselves, and to encrypt user passwords. We need to provide updated values for all these use cases.

In docker-compose-sdp-anchor.yml, update the following:

# The public key of the Stellar account used for SEP-10 authentication:
SEP10_SIGNING_PUBLIC_KEY:
#
# The private key of the Stellar account used for SEP-10 authentication. It
# should be the same secret key for both attributes below, for the Stellar
# Disbursement Platform and Anchor Platform:
SEP10_SIGNING_PRIVATE_KEY:
SECRET_SEP10_SIGNING_SEED:
#
# The encryption key used to sign the resulting SEP-10 JWT token:
SECRET_SEP10_JWT_SECRET:
#
# A shared encryption key used to sign JWT tokens in the SEP-24 from the Anchor
# Platform to the Stellar Disbursement Platform. The value needs to be the same
# for all three attributes below:
SEP24_JWT_SECRET:
SECRET_SEP24_INTERACTIVE_URL_JWT_SECRET:
SECRET_SEP24_MORE_INFO_URL_JWT_SECRET:
#
# A shared encryption key used to sign JWT tokens in the PlatformAPI
# communications from the Stellar Disbursement Platform to the Anchor Platform.
# The value needs to be the same for both attributes below:
ANCHOR_PLATFORM_OUTGOING_JWT_SECRET:
SECRET_PLATFORM_API_AUTH_SECRET:
#
# The private key is used to sign JWT tokens for authenticating the requests
# incoming to the Stellar Disbursement Platform. The Public key is used to
# validate that the JWT token was signed by the SDP's private key. They can be
# generated with these commands:
# openssl ecparam -name prime256v1 -genkey -noout -out ec_private_key.pem
# openssl pkcs8 -topk8 -nocrypt -in ec_private_key.pem -out ec_private_key_pkcs8.pem
# openssl ec -in ec_private_key.pem -pubout -out ec_public_key.pem
EC256_PUBLIC_KEY:
EC256_PRIVATE_KEY:
#

There are many other configuration values to update when moving to a production environment, such as database credentials, URLs, and more.

Level Up: Customize Default Options

The SDP contains a list of assets, countries, and wallets available for disbursements out-of-the-box. You might want to customize these, either to limit/expand options or to prepare for going live in production. Now that you've made a disbursement and added application secrets, let's look at how to customize the new disbursement options.

Assets

You can add and remove assets easily in the SDP dashboard. The SDP backend handles the request seamlessly, including checking for outstanding balance and adding/removing trustlines on the Stellar network. When assets are removed, the record is still retained in the database to preserve a full history. However, the asset will no longer be available for disbursements or holding a balance in the distribution account.

Head to the Wallets page of the SDP dashboard to add and remove assets. You'll need the Stellar asset code and the public key of the asset issuer.

Note: please make sure to update the appropriate configuration on the Anchor Platform side, according with the Anchor Platform Integration Points guide.

Countries

To customize wallets and countries, you’ll need to do some backend work.

The list of available countries is seeded with a database patch. The default list includes every country except North Korea, Iran, Cuba, and Syria for easy testing. If you want to narrow the list, you will need to remove the country record directly from the countries table within the SDP database.

Here is an example of how to remove France with its three-character ISO 3166 code:

DELETE FROM countries WHERE code = 'FRA';

Wallets

For a full overview on how to add wallets and how to make a wallet SDP-compatible, check out the Making Your Wallet SDP-Ready guide.