Overview
In this tutorial, we'll walk you through building an old-timey internet guestbook! (Trust me, they were all the rage back in the day.) We'll be examining how the project is constructed, starting with the smart contract. Then, we'll turn that deployed smart contract into a "bindings package," allowing us to seamlessly integrate it into our frontend project. To get our users authenticated, we'll be using Stellar's new passkeys capability and giving each of our users their very own smart wallet. As a bonus, this guestbook is already a usable project (on Testnet) you can experiment with and use right now! After this tutorial, you'll have a solid understanding of how smart contracts and web applications can work together in harmony. You'll also have practical tools and examples for how you might integrate passkey-powered smart wallets into your own projects.
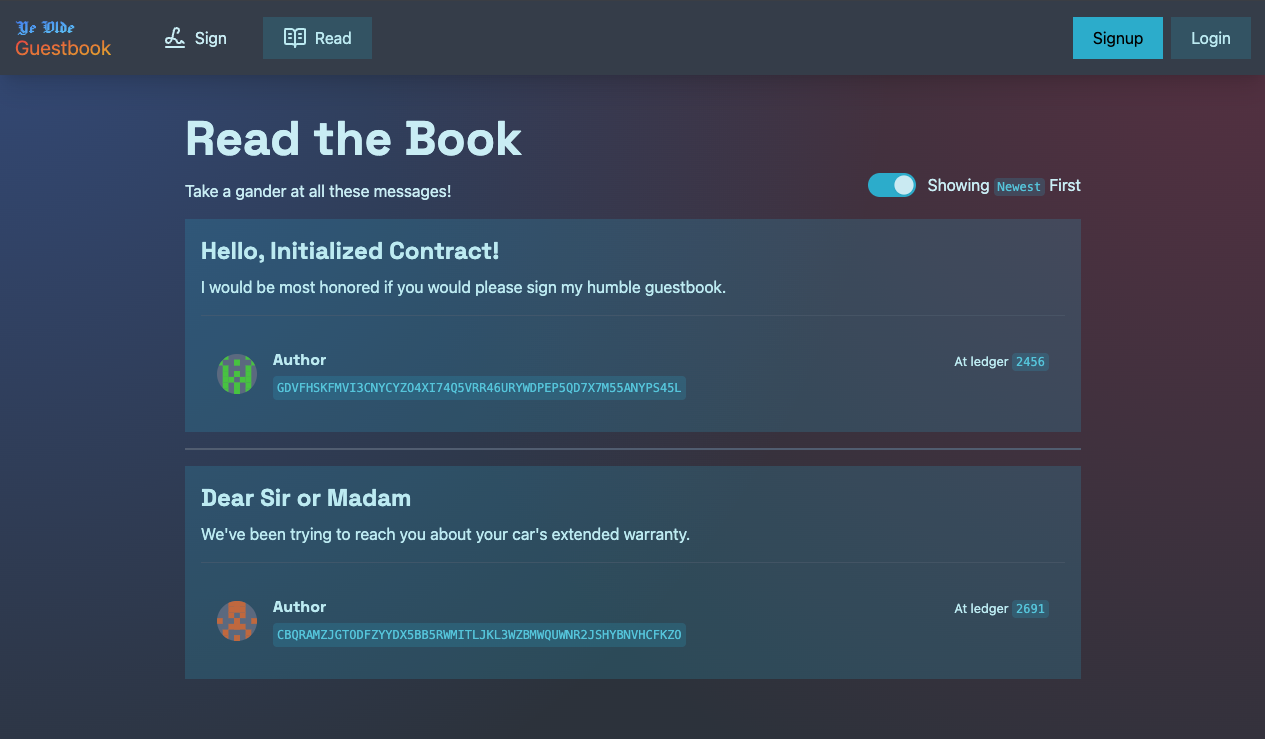
For this tutorial, we'll walk through the steps as we build a sample application we've called Ye1 Olde Guestbook, which will be used to showcase various features.
Although Ye Olde Guestbook is a full-fledged application on Stellar's Testnet, it has been built solely to showcase Stellar functionality for the educational benefit of the Stellar community. It should not be deployed and used on Stellar Mainnet.

Project setup
Project requirements
To build this guestbook application, we'll need a few pieces.
- Application framework: we're using SvelteKit, opting for a type-checked project using TypeScript. SvelteKit (and Svelte on its own) is quite a capable framework, and we'll be using some of its features in this project. However, we will not be diving into those Svelte-specific areas very heavily in this tutorial. The source code of the project is freely open and available and has some decent informational comments throughout if you would like to peruse it for those purposes.
- Frontend framework: We're using Skeleton to simplify the use of Tailwind CSS.
- A way to interact with the network: this is a TypeScript application, and we're using the
@stellar/stellar-sdkfor this. You could make traditionalfetchrequests if you wanted to, depending on your deployment decisions. In either case, we'll need the SDK to interact with keypairs and transactions. We'll also be using a data indexer to access historical network events, and we'll cover more of this at a later point in the tutorial. - A way to interact with a user's account: we're foregoing the traditional wallets here, and we'll use
passkey-kitto give our users a smart wallet to interact with. They can interact with this smart wallet (via passkey-kit) through methods they're already familiar with (thumbprints, face ID, etc.).
While we are using the above components to construct our application, we have done our best to write this tutorial in such a way that dependency on any one of these things is minimized. Ideally, you should be able to use the TypeScript code we've written and plug it into any other framework you'd like with minimal effort.
Some choices we've made during the course of development:
- Some of the non-Stellar components lean a bit more into the Svelte way of doing things, but we've worked to make it fairly easily translatable into React, Astro, etc.
- This project is written so that a single deployment of the app interacts with a single deployment of the smart contract. It could be written differently, but we haven't here for the sake of simplicity.
- We're rolling our own passkeys service here. That means we'll set up and use
passkey-kit(both client- and server-side components) in our own dapp. In the long run, this may not be the necessary usage pattern. It's likely that services will crop up to act as a "wallet factory" that can create smart wallets, and facilitate adding signers for various applications. Perhaps these services will be provided by existing wallets? Perhaps these services will be unknown to the user (and maybe even developers) in the future? Who knows! The sky's the limit! (But that's not the case yet, so we're doing it ourselves.) - It should be relatively responsive, no promises, though
- We've chosen a theme from Skeleton, so it looks nice right away.
- There's a mix of client- and server-side logic. This is due to the fact that we'll need to keep some authentication credentials secret, and we want to avoid leaking these to the user-facing code. Some of these techniques are a bit SvelteKit-specific, but it should ultimately be understandable.
- We're deploying to a free-tier Vercel project. We've had really good success in getting SvelteKit and Stellar projects deployed easily and quickly, and with very little configuration. Your mileage may vary, but this should be a pretty decent starting point.
- The application is likely not as performant as it could be. Neither is it as optimized as it could be. We've tried to encapsulate the various functionalities in a way that makes sense to the developer reading the codebase, so there is some code duplication and things could be done in a "better" way.
- We do some error handling, but not nearly as much as you would want for a real-world application. If something seems like it's not working, and you're not seeing an error, open your developer console, and you might be able to figure out what has gone wrong.
- We have not implemented any automated testing. You'll probably want some for your application.
This tutorial is probably best viewed as "nearly comprehensive." We aren't going to walk you through each and every file in our codebase, and the files we do use to illustrate concepts in the tutorial may not be entirely present or explained. However, we will cover the basics, and point you to more complete examples in the codebase when applicable.
Dev helpers
- Passkey Kit: A TypeScript SDK for creating and managing Stellar smart wallets.
- Launchtube: Similar to a Paymaster in the EVM world, the Launchtube service aims to alleviate all of the challenges and complexities of getting a transaction on-chain by giving you an API that accepts Soroban ops and then handles getting those entries successfully submitted to the network.
- Stellar Lab: An experimental playground to interact with the Stellar network.
Getting started
Here are the steps we've taken to start building Ye Olde Guestbook. Feel free to be inspired and customize these directions as you see fit. The entire Ye Olde Guestbook codebase is freely open and available on GitHub for reference.
Start from the soroban-template repository
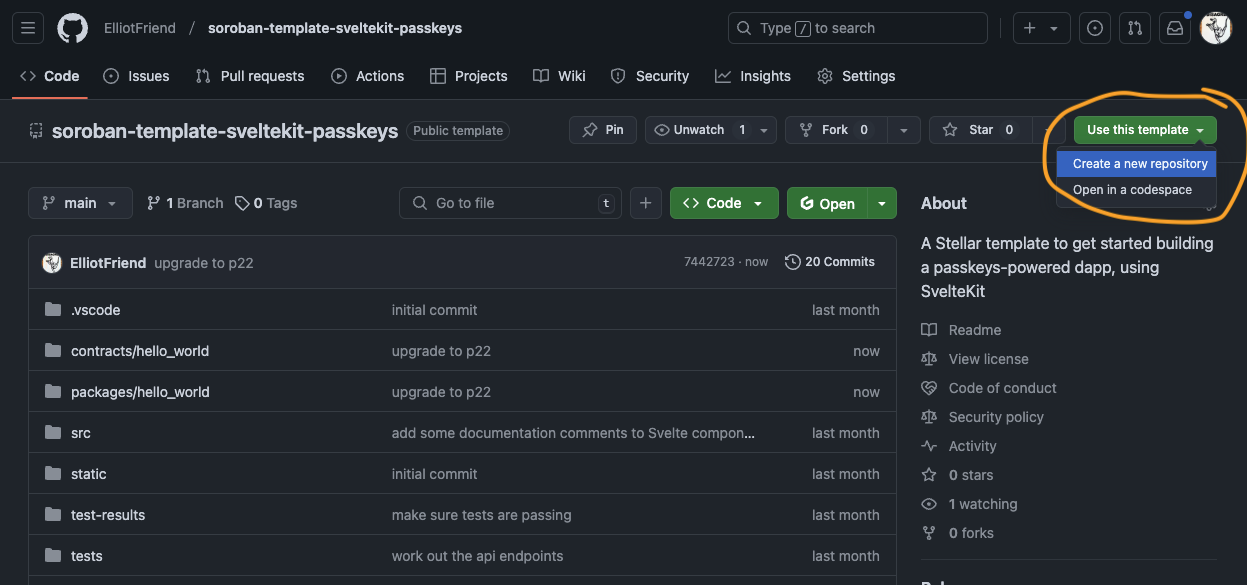
With the move to smart contract development, a newly emerging utility in the Stellar ecosystem is the "Soroban template." These templates can help alleviate the burden of writing boilerplate code, and can help adapt typical Stellar development workflows into framework-specific reference templates. We've created just such a template that can help you get started developing with SvelteKit and passkeys from the very beginning. You can either use the template on the GitHub website:

Or, you can (fork and) clone the template repository locally, and start working that way:
git clone https://github.com/ElliotFriend/soroban-template-sveltekit-passkeys ye-olde-guestbook
This frontend template will give you some scaffolding and some (opinionated) defaults. What you do from there is up to you!
This template will give you a few things to help you hit the ground running:
- a starter
/contractsdirectory with ahello_worldcontract in it, - a pre-configured set of dependencies and packages, including the
hello_worldbindings package, - boilerplate passkey logic and helpers already written out-of-the-box,
- an initialization script to deploy contracts and generate bindings for them, and
- you'll have a ready-to-customize SvelteKit site, written using TypeScript.
What more could you want!?
Set up the .env file
The template comes with a .env.example file, that you will need to modify. First, copy or move this file to .env:
cp .env.example .env
Then, open up the .env file, and begin customizing any of the entries you need. If you're planning to run on Testnet (and you should start there), most of the variables will be suitable as-is.
Some variables you will want to change include:
PUBLIC_STELLAR_ACCOUNT=stroopy # you're welcome to use stroopy, but if you have an name you'd prefer, put that here
PRIVATE_FUNDER_SECRET_KEY=S...ECRET # fund an account on Testnet and put the secret key here
PUBLIC_FUNDER_PUBLIC_KEY=G...ADDRESS # put the public key from the funded account here
Install dependencies
With our pre-existing template, everything you need should be pulled in from the package.json and Cargo.toml files. All you've got to do is open up a terminal and install the dependencies:
pnpm install
We're not aiming to dictate which package manager you should use. When building a full-stack SvelteKit app using Stellar and passkeys, we've recently seen a lot of success and reliability using pnpm. Who's to say why that's the case, and it certainly could be a fluke and limited to our own experience. In any case, we'll be using pnpm for the remainder of this tutorial.
Next up, let's look at the smart contract at the heart of the project.