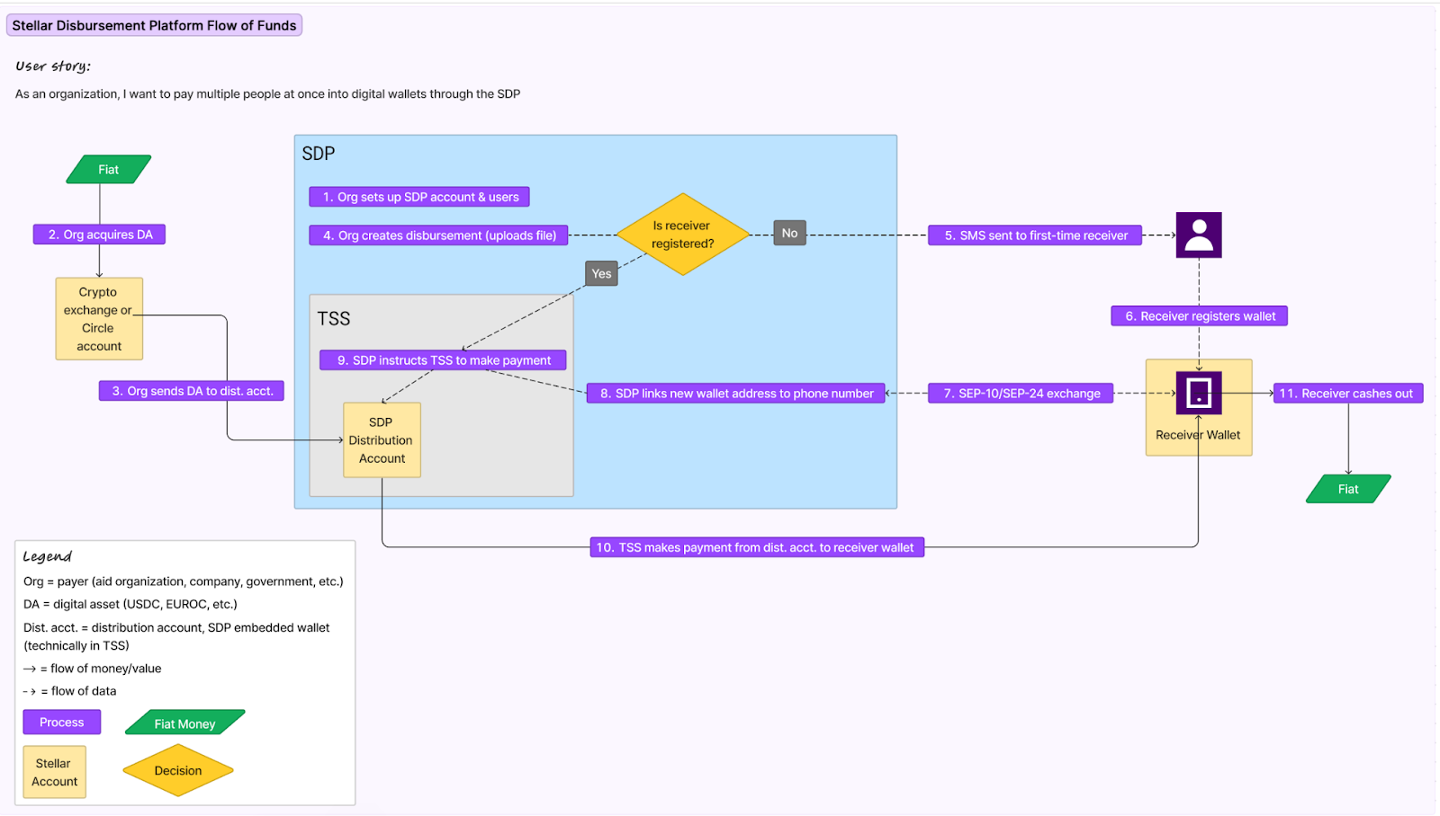
Overview
The entire SDP step-by-step process usually looks something like the following after the SDP is deployed and organizational users have been set up:
- The organization funds the SDP’s distribution account with a Stellar-based asset (e.g. USDC)
- An administrator logs in to the SDP’s dashboard and uploads a CSV file containing the payment information to initiate a new disbursement
- The SDP sends a text message to every first-time recipient in the CSV inviting them to download a Stellar-enabled wallet application
- Meanwhile, the SDP immediately begins making payments to each recipient that already has a wallet registered to them
- Each first-time recipient clicks a deep link to download the Stellar-enabled wallet application chosen by the organization for this disbursement, downloads the app, and goes through the wallet sign-up process
- Once the recipient has signed up and their Stellar account has been created, the wallet immediately authenticates with the SDP using parameters from the deep link and opens the SDP registration web view for the recipient to complete verification
- The user confirms their identity by providing an OTP code sent to their phone number and an additional piece of verification information for security purposes. The SDP supports three different types of verification information: Date of Birth, Personal PIN, and National ID. This information is input by the recipient in a web flow and passes directly to the SDP, meaning the wallet does not need to process or store this information.
- The SDP verifies the recipient’s information. If it matches the information from the CSV, the SDP automatically makes the payment to the recipient’s Stellar account
Graphic representation of flow of funds: