Configuration
Modify a Stellar Info File
Next, let's modify stellar.toml file created earlier. Wallets need to know that SEP-24 functionality is supported by your business, and they also need to know all currencies you support.
- TOML
# dev.stellar.toml
ACCOUNTS = ["add your public keys for your distribution accounts here"]
SIGNING_KEY = "add your signing key here"
NETWORK_PASSPHRASE = "Test SDF Network ; September 2015"

TRANSFER_SERVER_SEP0024 = "http://localhost:8080/sep24"
WEB_AUTH_ENDPOINT = "http://localhost:8080/auth"

# Add support for USDC
[[CURRENCIES]]
code = "USDC"
issuer = "GBBD47IF6LWK7P7MDEVSCWR7DPUWV3NY3DTQEVFL4NAT4AQH3ZLLFLA5"
status = "test"
is_asset_anchored = false
desc = "USD Coin issued by Circle"

# Optionally, add support for XLM
[[CURRENCIES]]
code = "native"
status = "test"
is_asset_anchored = false
anchor_asset_type = "crypto"
desc = "XLM, the native token of the Stellar network."

[DOCUMENTATION]
ORG_NAME = "Your organization"
ORG_URL = "Your website"
ORG_DESCRIPTION = "A description of your organization"
Note that you'll need to create another file for your production deployment that uses the public network's passphrase, your production service URLs, your Mainnet distribution accounts and signing key, as well as the Mainnet issuing accounts of the assets your service utilizes.
Enable Hosted Deposits & Withdrawals
Now you're ready to enable hosted deposits and withdrawals via the SEP-24 API. Specify the following in your dev.assets.yaml file, and change the values depending on your preferences. This example asset file will enable support for Circle's USDC and a fiat USD.
- YAML
# dev.assets.yaml
items:
  - id: stellar:USDC:GBBD47IF6LWK7P7MDEVSCWR7DPUWV3NY3DTQEVFL4NAT4AQH3ZLLFLA5
    distribution_account: GBLSAHONJRODSFTLOV225NZR4LHICH63RIFQTQN37L5CRTR2IMQ5UEK7
    significant_decimals: 2
    sep24:
      enabled: true
      deposit:
        enabled: true
        min_amount: 0
        max_amount: 10
        methods:
          - SEPA
          - SWIFT
      withdraw:
        enabled: true
        min_amount: 0
        max_amount: 10
        methods:
          - bank_account
          - cash
  - id: iso4217:USD
    significant_decimals: 2
  # Optional support for XLM
  - id: stellar:native
    distribution_account: GBLSAHONJRODSFTLOV225NZR4LHICH63RIFQTQN37L5CRTR2IMQ5UEK7
    significant_decimals: 7
    sep24:
      enabled: true
      deposit:
        enabled: true
        min_amount: 0
        max_amount: 10
        methods:
          - SEPA
          - SWIFT
      withdraw:
        enabled: true
        min_amount: 0
        max_amount: 10
        methods:
          - bank_account
          - cash
The information provided for the assets value closely maps to the information that will be exposed to the wallet application using the GET /info SEP-24 endpoint. The Anchor Platform also uses this information to validate requests made to your service.
Add the following variables to your environment file.
- bash
# dev.env
// Required
SEP24_ENABLED=true
SEP24_INTERACTIVE_URL_BASE_URL=http://example.com
SEP24_MORE_INFO_URL_BASE_URL=http://example.com
SECRET_SEP24_INTERACTIVE_URL_JWT_SECRET="your encryption key shared with your business server"
SECRET_SEP24_MORE_INFO_URL_JWT_SECRET="your encryption key shared with your business server"

// Optional
SEP24_INITIAL_USER_DEADLINE_SECONDS=1209600
SEP24_INTERACTIVE_URL_BASE_URL is the URL that the Anchor Platform will provide to wallet applications when they initiate transactions. Wallet applications will open this URL in a web view inside their app, handing over control of the user experience from the wallet to your business. This URL points to the web widget your business implements. It contains all business-defined logic. We'll dive further into this experience in subsequent sections.
SEP24_MORE_INFO_URL_BASE_URL is the URL that the Anchor Platform will provide to wallet applications when they want to show information about a transaction initiated previously. This URL is most often used by wallets in their transaction history views, and your business can define what information to display about the transaction.
SECRET_SEP24_INTERACTIVE_URL_JWT_SECRET and SECRET_SEP24_MORE_INFO_URL_JWT_SECRET are encryption keys that the Anchor Platform will use to generate short-lived tokens it will add to the URLs provided to the wallet. Your business server must also have these keys in its environment so it can verify the token's signature.
SEP24_INITIAL_USER_DEADLINE_SECONDS is an optional param that defines the time in seconds a user has to act before the transaction moves to the next status. It determines the user_action_required_by field, which indicates the deadline. Check JSON-RPC Methods for usage examples.
Test With the Demo Wallet
Wallets should now be able to discover, authenticate, and initiate transactions with your service! Your project and source files should now look something like this.
- Example
├── dev.env
├── docker-compose.yaml
├── config
│   ├── dev.assets.yaml
│   ├── dev.stellar.toml
Your environment should now look like the following.
- bash
# dev.env
ASSETS_TYPE=file
ASSETS_VALUE=/home/dev.assets.yaml

SEP1_ENABLED=true
SEP1_TOML_TYPE=file
SEP1_TOML_VALUE=/home/dev.stellar.toml

SEP10_ENABLED=true
SEP10_HOME_DOMAIN=localhost:8080
SECRET_SEP10_SIGNING_SEED="a Stellar private key"
SECRET_SEP10_JWT_SECRET="a secret encryption key"

SEP24_ENABLED=true
SEP24_INTERACTIVE_URL_BASE_URL=http://localhost:8081
SECRET_SEP24_INTERACTIVE_URL_JWT_SECRET="your encryption key shared with your business server"
SECRET_SEP24_MORE_INFO_URL_JWT_SECRET="your encryption key shared with your business server"
To test this out, go to the Stellar Demo Wallet.
Initiate a transaction by doing the following:
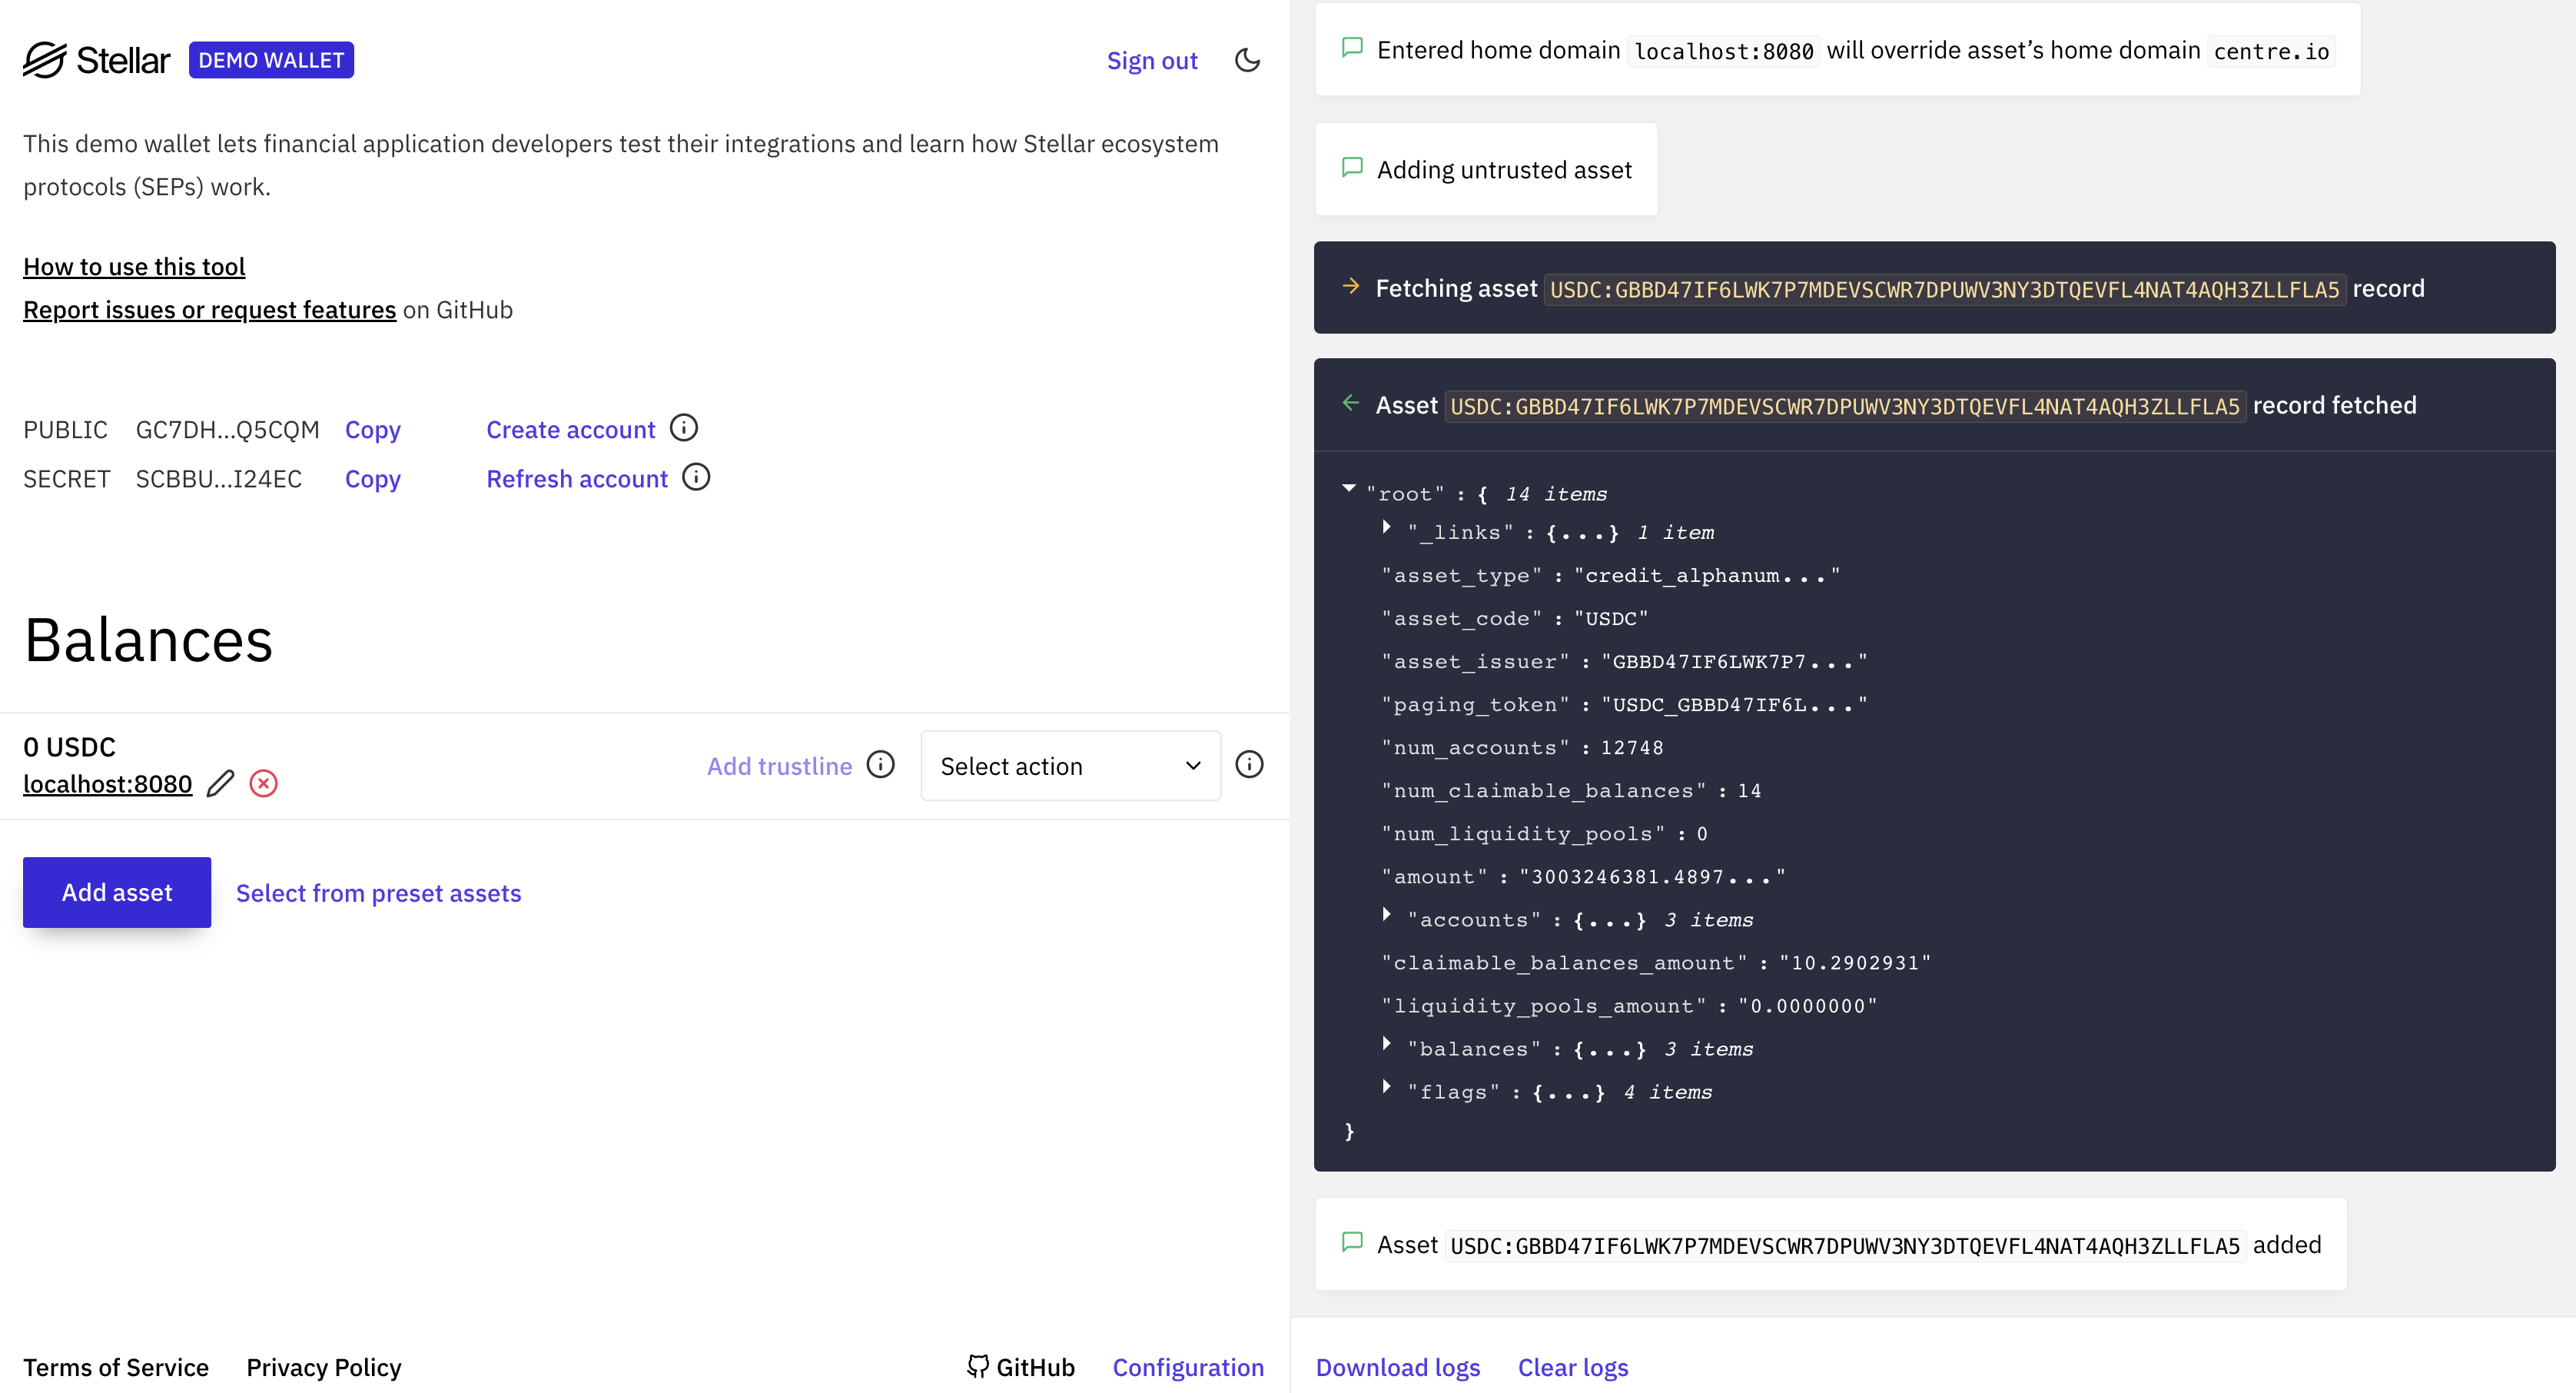
- Create a new keypair
- Click the "Add Asset" button and enter
- the code of the Stellar asset on your
stellar.tomlfile - your home domain,
localhost:8080
- the code of the Stellar asset on your
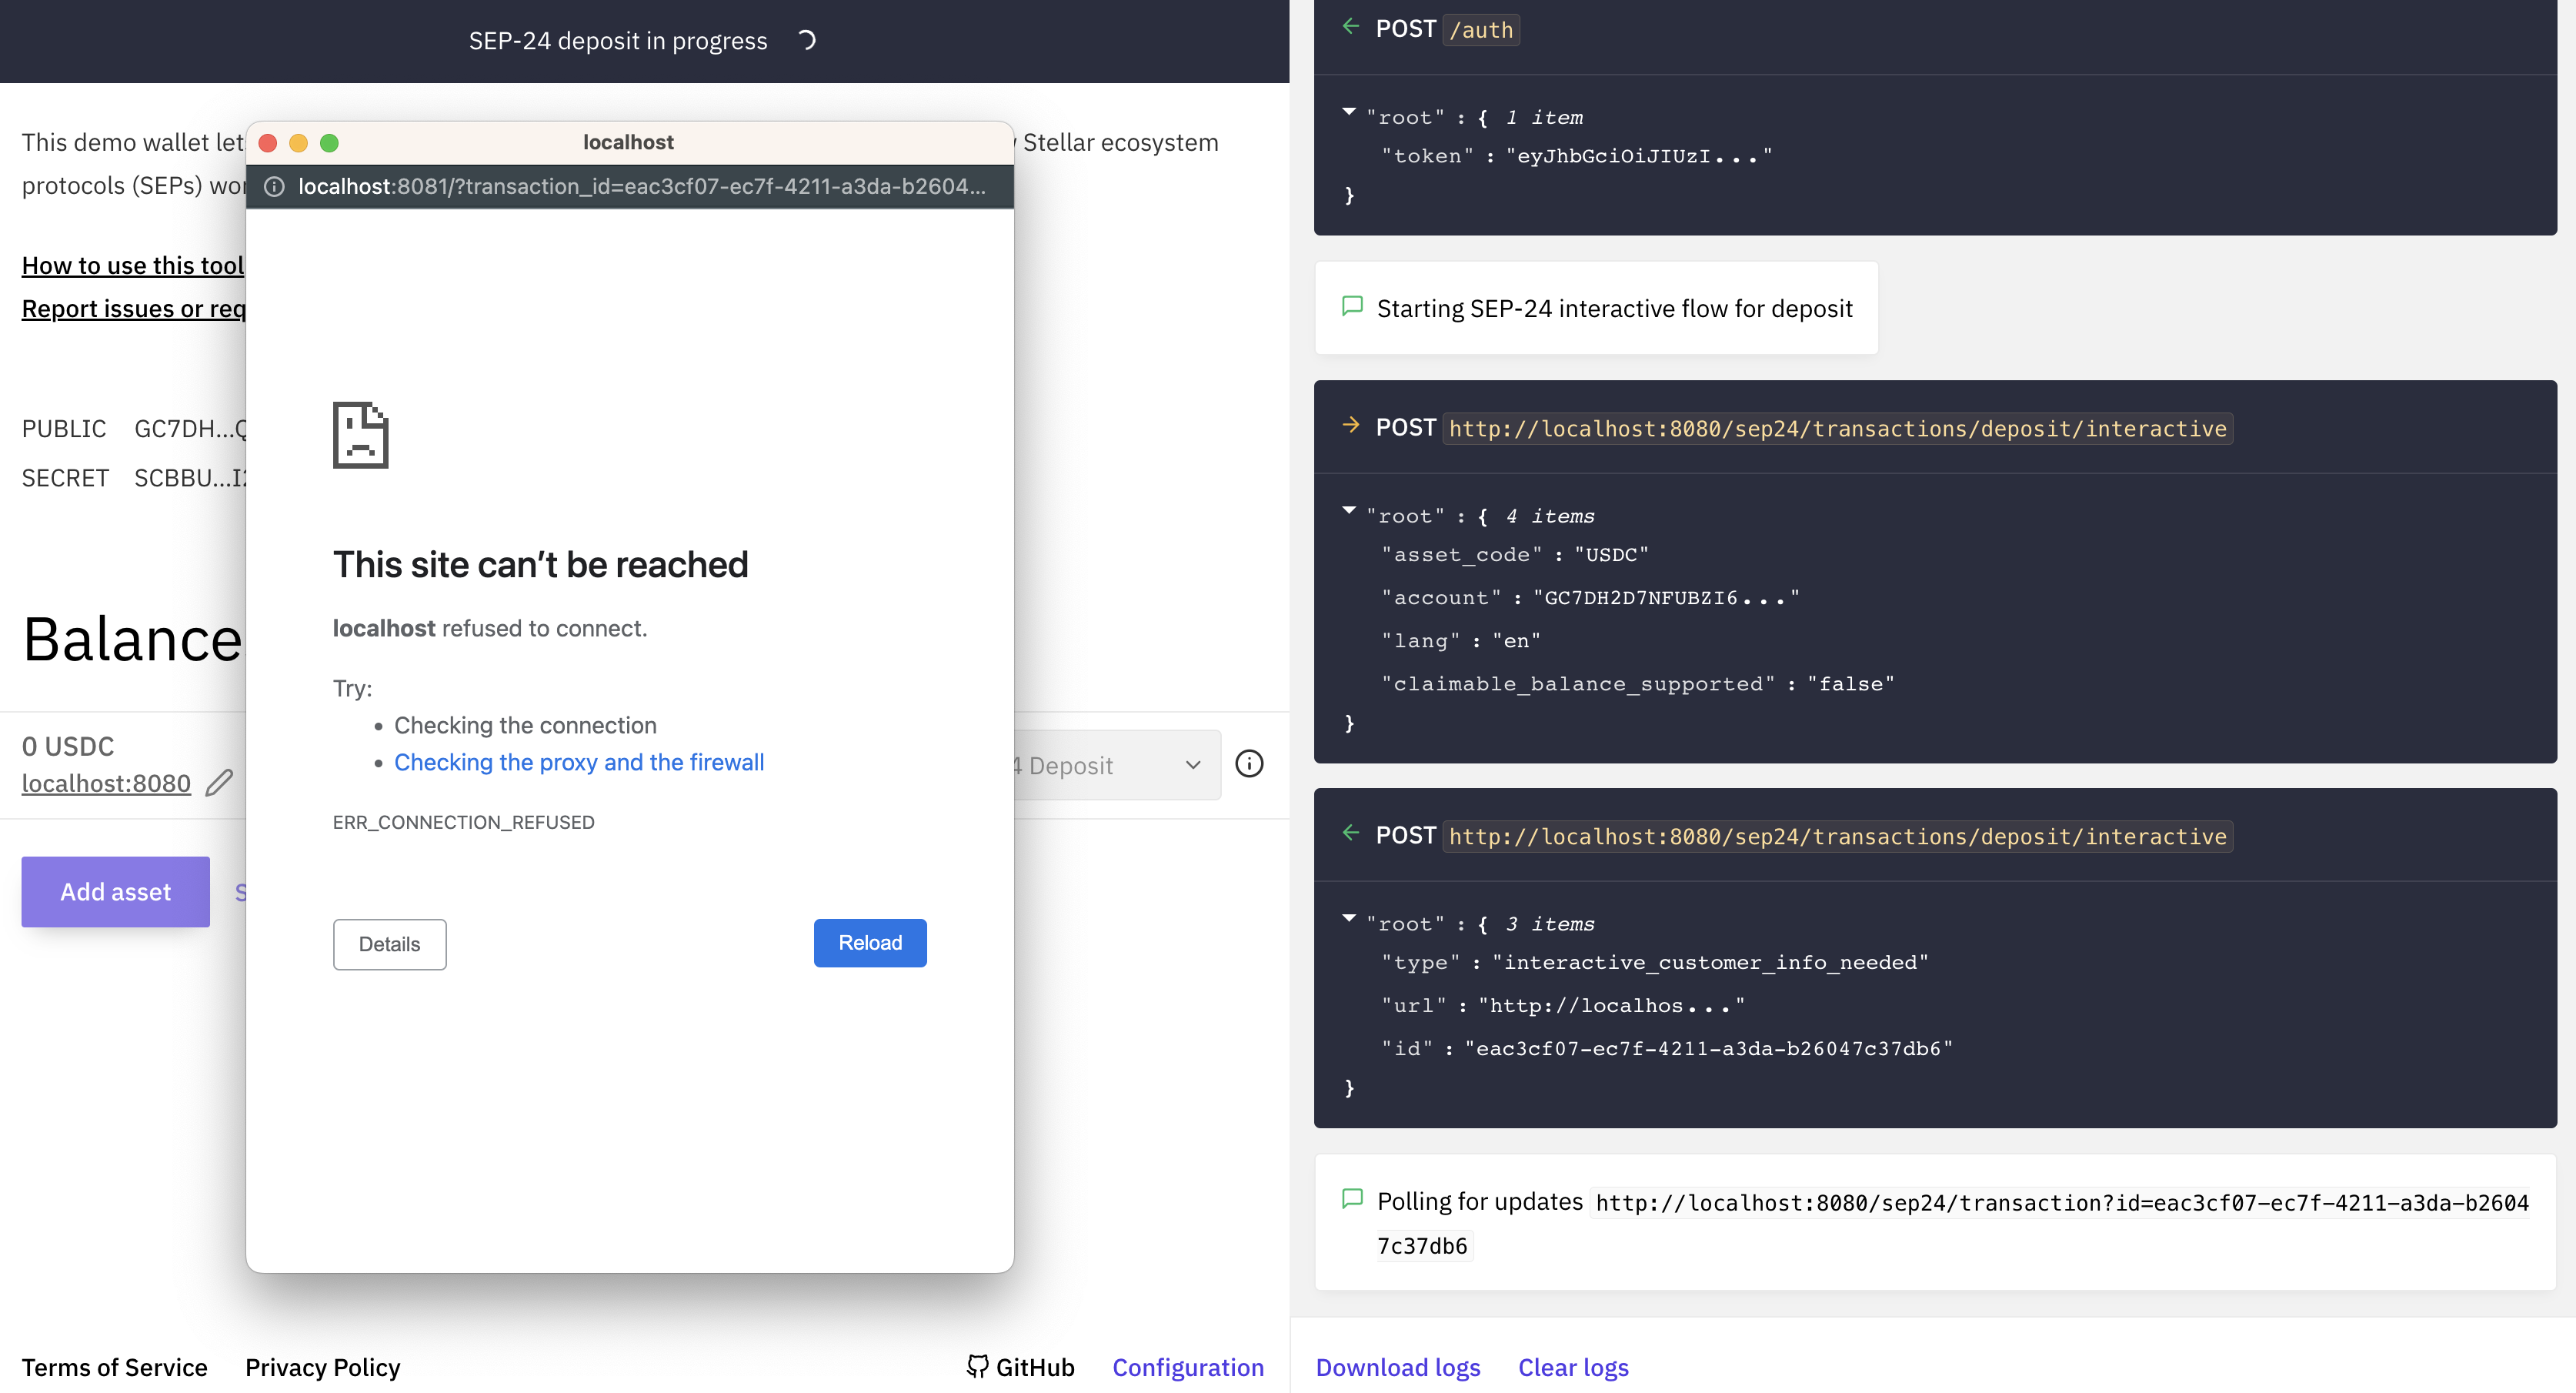
- Select the dropdown and click "SEP-24 Deposit", then click "Start"
The demo wallet should be able to find your stellar.toml file, authenticate using the Stellar keypair you just created, and initiate a transaction. However, when the demo wallet attempts to open the URL provided by the Anchor Platform, you'll get a not found page.

