Account
Create Account Keypair
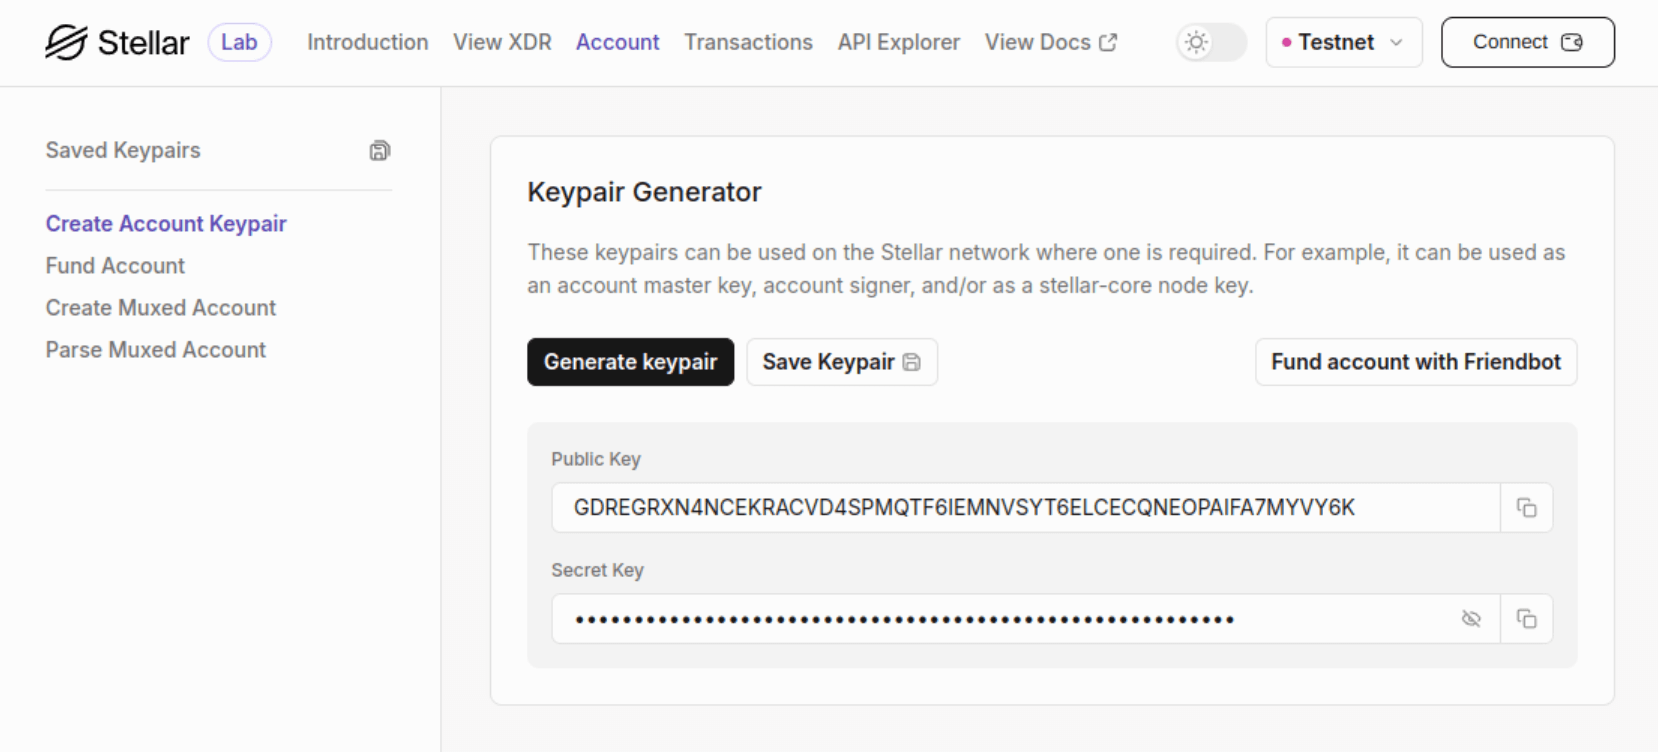
From the Lab’s top navigation, click on the "Account" link. You will land on the "Create Account Keypair" page, where you can generate a keypair by following these steps:
- Make sure you are on the Stellar network for which you want to generate the keypair. You can see the current network in the upper right corner of the page. Click on dropdown to change the network (don’t forget to provide any necessary information). We will use Testnet network for this example.
- Click the "Generate keypair" button to create public and secret keys for an account. Save them someplace safe, even if they are used only for testing.
Anyone with the account’s secret key has full access and control over the account. Keep the secret key safe.
- An account is active only once it is funded. You can use Friendbot to fund it on Testnet and Futurenet networks only. Click on the "Fund account with Friendbot" button to add 10,000 XLM to the account. When the operation completes, a message will be displayed at the bottom.
The Friendbot can be used for new account or accounts with balance under a starting balance of 10,000 XLM. Click the "Fund account with Friendbot" button again to see what happens. It’s the Lab, so feel free to experiment (as long as you are on Testnet or Futurenet network)!
- Optionally, to save the generated keypair, click the "Save Keypair" button. Enter the name in the pop-up and click the "Save" button to save the keypair in the browser's local storage. Click the "Saved Keypairs" link on the left-side menu to view saved keypairs. The save feature is available only on Testnet and Futurenet networks.
Fund Account
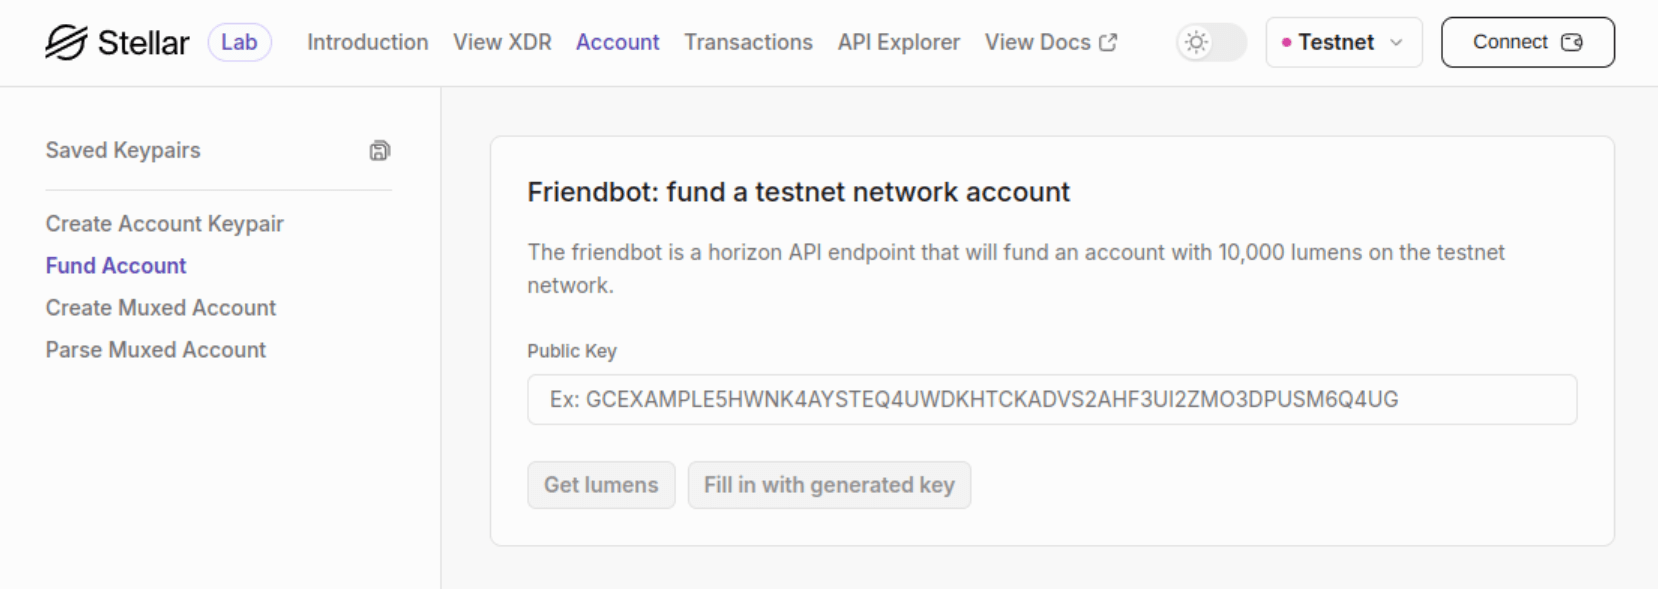
If you already have a keypair you want to fund, go to the "Fund Account" page.
- If you have generated a keypair on the "Create Account Keypair" page, you can use its public key by clicking the "Fill in the generated key" button. The button will be disabled if there is no keypair.
- You can always manually input a public key.
- Once you enter the public key, click the "Get lumens" button to fund the account with 10,000 XLM on the Testnet or Futurenet network.
- You will see a response message once the operation is completed.
You can also create an account using a Stellar SDK. Follow a guide here.
Saved Keypairs
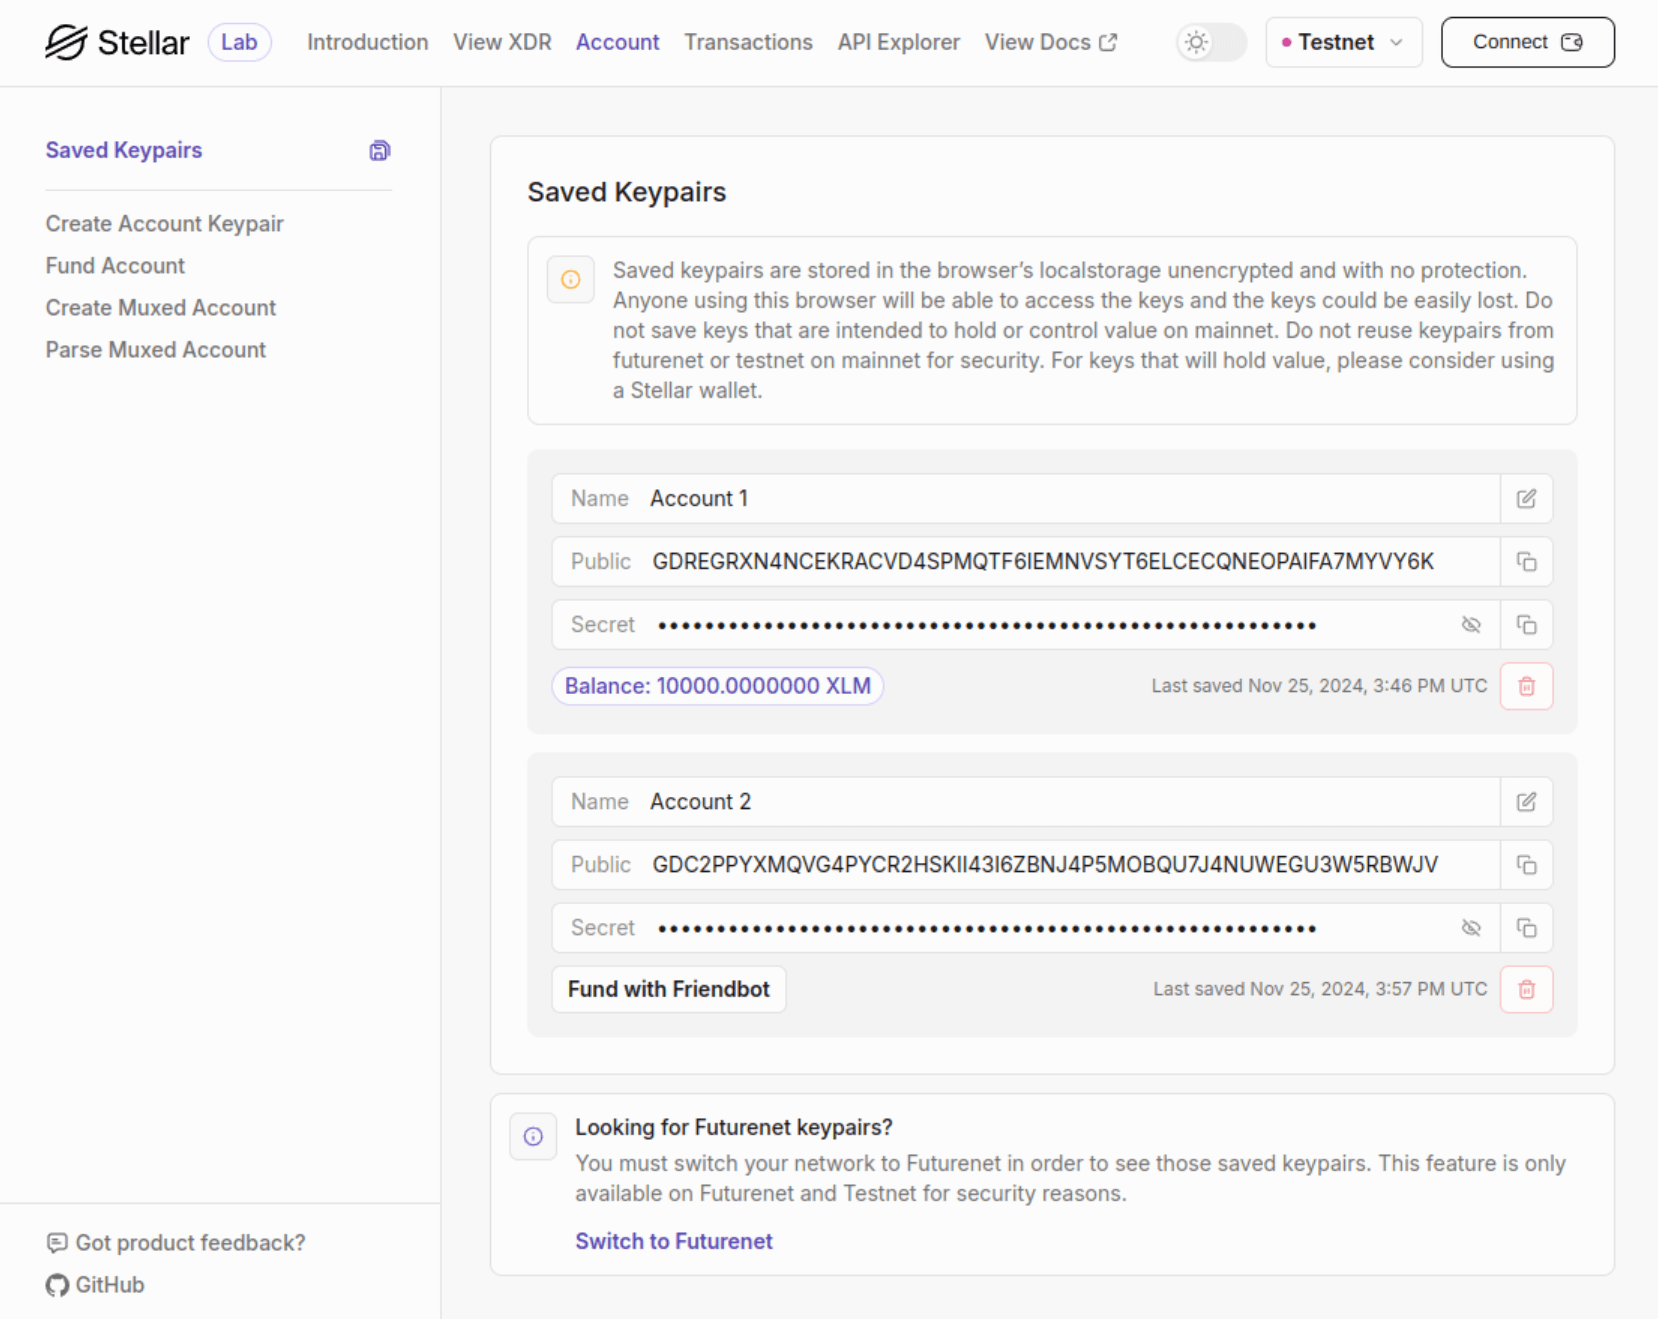
This page shows you saved keypairs for the selected network (only Testnet and Futurenet) in the browser's local storage. Every keypair has the following:
- Name - makes it easy to find the keypair you're looking for. You can update the name anytime by clicking the edit button and saving the new name.
- Public key - the public account address. You can quickly copy it with a click of a button.
- Secret key - the secret key of the account. Click the Eye button to toggle between masked and clear text format. Like the Public key, you can copy it by clicking the Copy button.
- Delete the saved keypair if it's no longer needed.
- The last saved date and time.
- XLM balance if the account is funded.
- If the account is unfunded, you can get 10,000 XLM by clicking the "Fund with Friendbot" button. This might be useful after the Testnet or Futurenet reset, as all your saved accounts will also be reset.