Smart Contract Development with Soroban and Hardhat
In this tutorial, we will discover the similarities in smart contract deployment by examining workflows with Soroban and Hardhat. We will dive into the intricacies of each framework, learn to write secure and efficient smart contract code, and harness the power of Rust and Soroban to create customized contract logic.
Table of Contents
- Soroban and Hardhat Comparison
- Hardhat vs Soroban SDKs
- Using Rust and Soroban for Smart Contract Development
- Vault Contract Deployment and Interaction
Soroban and Hardhat Comparison
Introduction
Soroban and Hardhat are both frameworks that enable developers to build, test, and deploy smart contracts. In this section, we will delve into the similarities and distinctions between these two frameworks.
Soroban Framework
Soroban is a Rust-based framework tailored for developing smart contracts on the Stellar network. Designed as a lightweight framework, with tools to support developers, Soroban allows developers to develop smart contracts through a simple and intuitive workflow.
Hardhat
Hardhat serves as a development environment for compiling, deploying, testing, and debugging smart contracts for the EVM. It assists developers in managing and automating recurring tasks inherent to building smart contracts.
Similarities
Soroban and Hardhat are powerful frameworks designed to streamline the process of building, testing, and deploying smart contracts. Equipped with a comprehensive suite of tools, these frameworks facilitate the development of smart contracts and their deployment on their respective virtual machines.
Differences
Soroban, with its lightweight design, offers developers an exceptional platform for writing Rust-based smart contracts and deploying them effortlessly on the Stellar network. In contrast, Hardhat serves primarily as a development environment tailored for the Ethereum Virtual Machine, providing a different focus and target audience.
Hardhat vs. Soroban SDKs
Hardhat offers a streamlined workflow for deploying smart contracts on the Ethereum Virtual Machine, with key components such as ethers.js, scripts, and testing playing crucial roles.
On the other hand, Soroban presents a compelling alternative, boasting powerful SDKs that facilitate smart contract development and deployment. In the upcoming section, we will delve into Soroban's SDKs, drawing comparisons with Hardhat components, and highlighting the unique advantages each platform brings to the table.
Ethers.js
Ethers.js is a widely-used JavaScript library designed for seamless interaction with the EVM. It offers a user-friendly interface that simplifies connecting to Ethereum nodes, managing accounts, and sending transactions. Additionally, Ethers.js provides a robust API for efficient communication with smart contracts. This library is a core component of the Hardhat framework and can be imported into scripts to streamline the deployment of smart contracts.
const { ethers } = require("hardhat");

async function main() {
  const [deployer] = await ethers.getSigners();

  console.log("Deploying contracts with the account:", deployer.address);
}
Soroban Client
Soroban offers a comparable library, stellar-sdk, that enables seamless interaction smart contracts deployed on the Stellar Network. This library supplies a comprehensive networking layer API for Stellar RPC methods as well as the deprecated Horizon API, simplifying the process of building and signing transactions. Additionally, stellar-sdk streamlines communication with RPC instances and supports submitting transactions or querying network state with ease.
Scripts
Hardhat scripts streamline the automation of routine tasks, such as deploying and managing smart contracts. Developers can create these scripts using either JavaScript or TypeScript, catering to their preferred programming style. They are stored in the scripts directory of a Hardhat project and can be executed using the npx hardhat run command.
// scripts/deploy.js

async function main() {
  // Compile and deploy the smart contract
  const MyContract = await ethers.getContractFactory("MyContract");
  const myContract = await MyContract.deploy();

  console.log("MyContract deployed to:", myContract.address);
}

main()
  .then(() => process.exit(0))
  .catch((error) => {
    console.error(error);
    process.exit(1);
  });
Soroban Scripts
Soroban offers an extensive collection of SDKs that include scripting capabilities, ensuring a smooth workflow for deploying and managing smart contracts. Developers can automate tasks such as compiling, deploying, and interacting with smart contracts using a variety of SDKs that support scripting in languages like JavaScript, TypeScript, Python, and others.
# This example shows how to deploy a compiled contract to the Stellar network.
# https://github.com/stellar/soroban-quest/blob/main/quests/6-asset-interop/py-scripts/deploy-contract.py

import time

from stellar_sdk import Network, Keypair, TransactionBuilder
from stellar_sdk import xdr as stellar_xdr
from stellar_sdk import SorobanServer

# TODO: You need to replace the following parameters according to the actual situation
secret = "SAAPYAPTTRZMCUZFPG3G66V4ZMHTK4TWA6NS7U4F7Z3IMUD52EK4DDEV"
rpc_server_url = "https://soroban-testnet.stellar.org"
network_passphrase = Network.TESTNET_NETWORK_PASSPHRASE
contract_file_path = "/path/to/compiled/soroban_contract.wasm"

kp = Keypair.from_secret(secret)
soroban_server = SorobanServer(rpc_server_url)

print("installing contract...")
source = soroban_server.load_account(kp.public_key)

# with open(contract_file_path, "rb") as f:
#     contract_bin = f.read()

tx = (
    TransactionBuilder(source, network_passphrase)
    .set_timeout(300)
    .append_upload_contract_wasm_op(
        contract=contract_file_path,  # the path to the contract, or binary data
        source=kp.public_key,
    )
    .build()
)
...
Testing
Hardhat provides a testing framework that allows developers to write tests for their smart contracts. These tests can be written in JavaScript or TypeScript and run using the npx hardhat test command.
// test/my-contract.js

const { expect } = require("chai");

describe("MyContract", function () {
  it("Should return the correct name", async function () {
    const MyContract = await ethers.getContractFactory("MyContract");
    const myContract = await MyContract.deploy();

    await myContract.deployed();
    expect(await myContract.name()).to.equal("MyContract");
  });
});
Soroban Testing
Soroban enables users to leverage the power of Rust's testing framework to write tests for their smart contracts. These tests can be written in Rust and run using the cargo test command.
#![cfg(test)]

use super::*;
use soroban_sdk::{vec, Env, Symbol, symbol_short};

#[test]
fn test() {
    let env = Env::default();
    let contract_id = env.register(HelloContract, ());
    let client = HelloContractClient::new(&env, &contract_id);

    let words = client.hello(&symbol_short!("Dev"));
    assert_eq!(
        words,
        vec![&env, symbol_short!("Hello"), symbol_short!("Dev"),]
    );
}
In summary, while Hardhat provides an excellent environment for deploying smart contracts on the EVM, Soroban's Rust-based framework offers significant advantages in terms of performance, making it an ideal choice for building secure and efficient smart contracts.
Developing Smart Contracts with Rust and Soroban
Introduction
Now that we've examined the deployment workflow with Hardhat, let's explore developing and deploying smart contracts with Rust and Soroban. The key advantage of using Soroban is its ability to leverage Rust's safety features and performance, making it an excellent choice for developing secure and efficient smart contracts.
We've learned that Smart contracts are self-executing contracts that can be programmed to automatically enforce the rules and regulations of a particular agreement. They are a core component of decentralized applications (dApps) and blockchain technology. In this section, we will learn how to use Rust and Soroban to develop and deploy custom smart contract logic.
Setup
If you haven't already setup up the dev environment for Soroban, you can get started by following the steps on the Setup Page.
This project requires using the soroban_token_contract.wasm file which you will need to import manually.
First, you will need to clone the v22.0.1 tag of soroban-examples repository:
git clone -b v22.0.1 https://github.com/stellar/soroban-examples
Then, navigate to the soroban-examples/token directory
cd soroban-examples/token
Next, build the Token contract using the following command:
stellar contract build
This will build the soroban_token_contract.wasm file which you will need to import into your project. The soroban_token_contract.wasm file is located in the soroban-examples/target/wasm32v1-none/release directory.
soroban-examples
├── target
│   └── wasm32v1-none
│       └── release
│           └── soroban_token_contract.wasm
└──
Once we have the Token, let's create a new smart contract that uses it.
Writing a Smart Contract
Let's start by writing a simple example of a vault contract that allows users to deposit funds and withdraw their funds with generated yield.
Here is a breakdown of the contract mechanics
- Shares are minted when a user deposits.
- The DeFi protocol uses the users' deposits to generate yield.
- User burns shares to withdraw their tokens + yield.
In a new terminal, let's create a new Rust project by running the following command:
cargo new --lib vault
This will create a new Rust project called vault.
Now let's add the soroban_token_contract.wasm file to the vault project. To do this, we can drag and drop the file into the vault project directory.
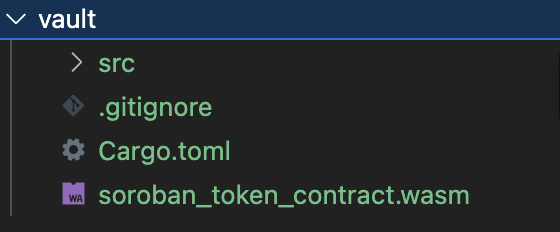
Next, we'll need to add the Soroban SDK as a dependency. To do this, open the Cargo.toml file in your project and ensure that it matches the following:
[package]
name = "vault"
version = "0.0.0"
edition = "2021"
publish = false

[lib]
crate-type = ["cdylib"]

[dependencies]
soroban-sdk = { version = "26" }
num-integer = { version = "0.1.45", default-features = false, features = ["i128"] }

[dev-dependencies]
soroban-sdk = { version = "26", features = ["testutils"] }

[profile.release]
opt-level = "z"
overflow-checks = true
debug = 0
strip = "symbols"
debug-assertions = false
panic = "abort"
codegen-units = 1
lto = true

[profile.release-with-logs]
inherits = "release"
debug-assertions = true
In this project we will need to create 3 files:
src/lib.rs- This is where we will write our vault smart contract logic.src/test.rs- This is where we will write our tests.src/token.rs- This is file inherits the token contact that we imported earlier. It's also where we will write our token creation logic.
To interact with the token contract, we'll use a built in interface that you can find in the token_interface.rs tab. This interface includes the initialize and mint functions that we will use to create and mint tokens for us to use in our vault contract. If you want to see the full code of the token contract, you can check it out here.
- src/lib.rs
- src/test.rs
- src/token.rs
- src/token_interface.rs
#![no_std]

mod test;
mod token;

use soroban_sdk::{
    contract, contractimpl, contractmeta, Address, BytesN, ConversionError, Env, IntoVal,
    TryFromVal, Val,
};
use token::create_contract;

#[derive(Clone, Copy)]
#[repr(u32)]
pub enum DataKey {
    Token = 0,
    TokenShare = 1,
    TotalShares = 2,
    Reserve = 3,
}

impl TryFromVal<Env, DataKey> for Val {
    type Error = ConversionError;

    fn try_from_val(_env: &Env, v: &DataKey) -> Result<Self, Self::Error> {
        Ok((*v as u32).into())
    }
}

fn get_token(e: &Env) -> Address {
    e.storage().instance().get(&DataKey::Token).unwrap()
}

fn get_token_share(e: &Env) -> Address {
    e.storage().instance().get(&DataKey::TokenShare).unwrap()
}

fn get_total_shares(e: &Env) -> i128 {
    e.storage().instance().get(&DataKey::TotalShares).unwrap()
}

fn get_reserve(e: &Env) -> i128 {
    e.storage().instance().get(&DataKey::Reserve).unwrap()
}

fn get_balance(e: &Env, contract: Address) -> i128 {
    token::Client::new(e, &contract).balance(&e.current_contract_address())
}

fn get_token_balance(e: &Env) -> i128 {
    get_balance(e, get_token(e))
}

fn get_balance_shares(e: &Env) -> i128 {
    get_balance(e, get_token_share(e))
}

fn put_token(e: &Env, contract: Address) {
    e.storage().instance().set(&DataKey::Token, &contract);
}

fn put_token_share(e: &Env, contract: Address) {
    e.storage().instance().set(&DataKey::TokenShare, &contract);
}

fn put_total_shares(e: &Env, amount: i128) {
    e.storage().instance().set(&DataKey::TotalShares, &amount)
}

fn put_reserve(e: &Env, amount: i128) {
    e.storage().instance().set(&DataKey::Reserve, &amount)
}

fn burn_shares(e: &Env, amount: i128) {
    let total = get_total_shares(e);
    let share_contract_id = get_token_share(e);

    token::Client::new(e, &share_contract_id).burn(&e.current_contract_address(), &amount);
    put_total_shares(e, total - amount);
}

fn mint_shares(e: &Env, to: Address, amount: i128) {
    let total = get_total_shares(e);
    let share_contract_id = get_token_share(e);

    token::Client::new(e, &share_contract_id).mint(&to, &amount);

    put_total_shares(e, total + amount);
}

// Metadata that is added on to the Wasm custom section
contractmeta!(
    key = "Description",
    val = "A Vault with a 1% return on investment per deposit."
);

pub trait VaultTrait {
    // Sets the token contract addresses for this vault
    fn initialize(e: Env, token_wasm_hash: BytesN<32>, token: Address);

    // Returns the token contract address for the vault share token
    fn share_id(e: Env) -> Address;

    // Deposits token. Also mints vault shares for the `from` Identifier. The amount minted
    // is determined based on the difference between the reserves stored by this contract, and
    // the actual balance of token for this contract.
    fn deposit(e: Env, from: Address, amount: i128);

    // transfers `amount` of vault share tokens to this contract, burns all pools share tokens in this contracts, and sends the
    // corresponding amount of token to `to`.
    // Returns amount of token withdrawn
    fn withdraw(e: Env, to: Address, amount: i128) -> i128;

    fn get_rsrvs(e: Env) -> i128;
}
#[contract]
struct Vault;

#[contractimpl]
impl VaultTrait for Vault {
    fn initialize(e: Env, token_wasm_hash: BytesN<32>, token: Address) {
        let share_contract_id = create_contract(&e, token_wasm_hash, &token);
        token::Client::new(&e, &share_contract_id).initialize(
            &e.current_contract_address(),
            &7u32,
            &"Vault Share Token".into_val(&e),
            &"VST".into_val(&e),
        );

        put_token(&e, token);
        put_token_share(&e, share_contract_id.try_into().unwrap());
        put_total_shares(&e, 0);
        put_reserve(&e, 0);
    }

    fn share_id(e: Env) -> Address {
        get_token_share(&e)
    }

    fn deposit(e: Env, from: Address, amount: i128) {
        // Depositor needs to authorize the deposit
        from.require_auth();

        let token_client = token::Client::new(&e, &get_token(&e));

        token_client.transfer(&from, &e.current_contract_address(), &amount);

        let balance = get_token_balance(&e);

        mint_shares(&e, from, amount);
        put_reserve(&e, balance);
    }

    fn withdraw(e: Env, to: Address, amount: i128) -> i128 {
        to.require_auth();

        // First transfer the vault shares that need to be redeemed
        let share_token_client = token::Client::new(&e, &get_token_share(&e));
        share_token_client.transfer(&to, &e.current_contract_address(), &amount);

        let token_client = token::Client::new(&e, &get_token(&e));
        token_client.transfer(
            &e.current_contract_address(),
            &to,
            &(&amount + (&amount / &100)),
        );

        let balance = get_token_balance(&e);
        let balance_shares = get_balance_shares(&e);

        burn_shares(&e, balance_shares);
        put_reserve(&e, balance - amount);

        amount
    }

    fn get_rsrvs(e: Env) -> i128 {
        get_reserve(&e)
    }
}
#![cfg(test)]
extern crate std;

use crate::{token, VaultClient};

use soroban_sdk::{
    symbol_short,
    testutils::{Address as _, AuthorizedFunction, AuthorizedInvocation},
    Address, BytesN, Env, IntoVal,
};

fn create_token_contract<'a>(e: &Env, admin: &Address) -> token::Client<'a> {
    token::Client::new(e, &e.register_stellar_asset_contract_v2(admin.clone()).address())
}

fn create_vault_contract<'a>(
    e: &Env,
    token_wasm_hash: &BytesN<32>,
    token: &Address,
) -> VaultClient<'a> {
    let vault = VaultClient::new(e, &e.register(crate::Vault {}, ()));
    vault.initialize(token_wasm_hash, token);
    vault
}

fn install_token_wasm(e: &Env) -> BytesN<32> {
    soroban_sdk::contractimport!(file = "./soroban_token_contract.wasm");
    e.deployer().upload_contract_wasm(WASM)
}

#[test]
fn test() {
    let e = Env::default();
    e.mock_all_auths();

    let admin1 = Address::random(&e);

    let token = create_token_contract(&e, &admin1);

    let user1 = Address::random(&e);

    let vault = create_vault_contract(&e, &install_token_wasm(&e), &token.address);

    let contract_share = token::Client::new(&e, &vault.share_id());

    let token_share = token::Client::new(&e, &contract_share.address);

    token.mint(&user1, &200);
    assert_eq!(token.balance(&user1), 200);
    token.mint(&vault.address, &100);
    assert_eq!(token.balance(&vault.address), 100);

    vault.deposit(&user1, &100);
    assert_eq!(
        e.auths(),
        std::vec![(
            user1.clone(),
            AuthorizedInvocation {
                function: AuthorizedFunction::Contract((
                    vault.address.clone(),
                    symbol_short!("deposit"),
                    (&user1, 100_i128).into_val(&e)
                )),
                sub_invocations: std::vec![AuthorizedInvocation {
                    function: AuthorizedFunction::Contract((
                        token.address.clone(),
                        symbol_short!("transfer"),
                        (&user1, &vault.address, 100_i128).into_val(&e)
                    )),
                    sub_invocations: std::vec![]
                }]
            }
        )]
    );

    assert_eq!(token_share.balance(&user1), 100);
    assert_eq!(token_share.balance(&vault.address), 0);
    assert_eq!(token.balance(&user1), 100);
    assert_eq!(token.balance(&vault.address), 200);

    e.budget().reset_unlimited();
    vault.withdraw(&user1, &100);
    assert_eq!(
        e.auths(),
        std::vec![(
            user1.clone(),
            AuthorizedInvocation {
                function: AuthorizedFunction::Contract((
                    vault.address.clone(),
                    symbol_short!("withdraw"),
                    (&user1, 100_i128).into_val(&e)
                )),
                sub_invocations: std::vec![AuthorizedInvocation {
                    function: AuthorizedFunction::Contract((
                        token_share.address.clone(),
                        symbol_short!("transfer"),
                        (&user1, &vault.address, 100_i128).into_val(&e)
                    )),
                    sub_invocations: std::vec![]
                }]
            }
        )]
    );
    assert_eq!(token.balance(&user1), 201);
    assert_eq!(token_share.balance(&user1), 0);
    assert_eq!(token.balance(&vault.address), 99);
    assert_eq!(token_share.balance(&vault.address), 0);
}
#![allow(unused)]
use soroban_sdk::{xdr::ToXdr, Address, Bytes, BytesN, Env};

soroban_sdk::contractimport!(file = "./soroban_token_contract.wasm");

pub fn create_contract(e: &Env, token_wasm_hash: BytesN<32>, token: &Address) -> Address {
    let mut salt = Bytes::new(e);
    salt.append(&token.to_xdr(e));
    let salt = e.crypto().sha256(&salt);
    e.deployer()
        .with_current_contract(salt)
        .deploy(token_wasm_hash)
}
//! This contract demonstrates a sample implementation of the Soroban token
//! interface.
use crate::admin::{has_administrator, read_administrator, write_administrator};
use crate::allowance::{read_allowance, spend_allowance, write_allowance};
use crate::balance::{is_authorized, write_authorization};
use crate::balance::{read_balance, receive_balance, spend_balance};
use crate::event;
use crate::metadata::{read_decimal, read_name, read_symbol, write_metadata};
use crate::storage_types::INSTANCE_TTL_EXTEND_AMOUNT;
use soroban_sdk::{contract, contractimpl, Address, Env, String};
use soroban_token_sdk::TokenMetadata;

pub trait TokenTrait {
    fn initialize(e: Env, admin: Address, decimal: u32, name: String, symbol: String);

    fn allowance(e: Env, from: Address, spender: Address) -> i128;

    fn approve(e: Env, from: Address, spender: Address, amount: i128, expiration_ledger: u32);

    fn balance(e: Env, id: Address) -> i128;

    fn spendable_balance(e: Env, id: Address) -> i128;

    fn authorized(e: Env, id: Address) -> bool;

    fn transfer(e: Env, from: Address, to: Address, amount: i128);

    fn transfer_from(e: Env, spender: Address, from: Address, to: Address, amount: i128);

    fn burn(e: Env, from: Address, amount: i128);

    fn burn_from(e: Env, spender: Address, from: Address, amount: i128);

    fn clawback(e: Env, from: Address, amount: i128);

    fn set_authorized(e: Env, id: Address, authorize: bool);

    fn mint(e: Env, to: Address, amount: i128);

    fn set_admin(e: Env, new_admin: Address);

    fn decimals(e: Env) -> u32;

    fn name(e: Env) -> String;

    fn symbol(e: Env) -> String;
}

fn check_nonnegative_amount(amount: i128) {
    if amount < 0 {
        panic!("negative amount is not allowed: {}", amount)
    }
}

#[contract]
pub struct Token;

#[contractimpl]
impl TokenTrait for Token {
    fn initialize(e: Env, admin: Address, decimal: u32, name: String, symbol: String) {
        if has_administrator(&e) {
            panic!("already initialized")
        }
        write_administrator(&e, &admin);
        if decimal > 18 {
            panic!("Decimal must not be greater than 18");
        }

        write_metadata(
            &e,
            TokenMetadata {
                decimal,
                name,
                symbol,
            },
        )
    }

    fn allowance(e: Env, from: Address, spender: Address) -> i128 {
        e.storage().instance().extend_ttl(INSTANCE_TTL_EXTEND_AMOUNT);
        read_allowance(&e, from, spender).amount
    }

    fn approve(e: Env, from: Address, spender: Address, amount: i128, expiration_ledger: u32) {
        from.require_auth();

        check_nonnegative_amount(amount);

        e.storage().instance().extend_ttl(INSTANCE_TTL_EXTEND_AMOUNT);

        write_allowance(&e, from.clone(), spender.clone(), amount, expiration_ledger);
        event::approve(&e, from, spender, amount, expiration_ledger);
    }

    fn balance(e: Env, id: Address) -> i128 {
        e.storage().instance().extend_ttl(INSTANCE_TTL_EXTEND_AMOUNT);
        read_balance(&e, id)
    }

    fn spendable_balance(e: Env, id: Address) -> i128 {
        e.storage().instance().extend_ttl(INSTANCE_TTL_EXTEND_AMOUNT);
        read_balance(&e, id)
    }

    fn authorized(e: Env, id: Address) -> bool {
        e.storage().instance().extend_ttl(INSTANCE_TTL_EXTEND_AMOUNT);
        is_authorized(&e, id)
    }

    fn transfer(e: Env, from: Address, to: Address, amount: i128) {
        from.require_auth();

        check_nonnegative_amount(amount);

        e.storage().instance().extend_ttl(INSTANCE_TTL_EXTEND_AMOUNT);

        spend_balance(&e, from.clone(), amount);
        receive_balance(&e, to.clone(), amount);
        event::transfer(&e, from, to, amount);
    }

    fn transfer_from(e: Env, spender: Address, from: Address, to: Address, amount: i128) {
        spender.require_auth();

        check_nonnegative_amount(amount);

        e.storage().instance().extend_ttl(INSTANCE_TTL_EXTEND_AMOUNT);

        spend_allowance(&e, from.clone(), spender, amount);
        spend_balance(&e, from.clone(), amount);
        receive_balance(&e, to.clone(), amount);
        event::transfer(&e, from, to, amount)
    }

    fn burn(e: Env, from: Address, amount: i128) {
        from.require_auth();

        check_nonnegative_amount(amount);

        e.storage().instance().extend_ttl(INSTANCE_TTL_EXTEND_AMOUNT);

        spend_balance(&e, from.clone(), amount);
        event::burn(&e, from, amount);
    }

    fn burn_from(e: Env, spender: Address, from: Address, amount: i128) {
        spender.require_auth();

        check_nonnegative_amount(amount);

        e.storage().instance().extend_ttl(INSTANCE_TTL_EXTEND_AMOUNT);

        spend_allowance(&e, from.clone(), spender, amount);
        spend_balance(&e, from.clone(), amount);
        event::burn(&e, from, amount)
    }

    fn clawback(e: Env, from: Address, amount: i128) {
        check_nonnegative_amount(amount);
        let admin = read_administrator(&e);
        admin.require_auth();

        e.storage().instance().extend_ttl(INSTANCE_TTL_EXTEND_AMOUNT);

        spend_balance(&e, from.clone(), amount);
        event::clawback(&e, admin, from, amount);
    }

    fn set_authorized(e: Env, id: Address, authorize: bool) {
        let admin = read_administrator(&e);
        admin.require_auth();

        e.storage().instance().extend_ttl(INSTANCE_TTL_EXTEND_AMOUNT);

        write_authorization(&e, id.clone(), authorize);
        event::set_authorized(&e, admin, id, authorize);
    }

    fn mint(e: Env, to: Address, amount: i128) {
        check_nonnegative_amount(amount);
        let admin = read_administrator(&e);
        admin.require_auth();

        e.storage().instance().extend_ttl(INSTANCE_TTL_EXTEND_AMOUNT);

        receive_balance(&e, to.clone(), amount);
        event::mint(&e, admin, to, amount);
    }

    fn set_admin(e: Env, new_admin: Address) {
        let admin = read_administrator(&e);
        admin.require_auth();

        e.storage().instance().extend_ttl(INSTANCE_TTL_EXTEND_AMOUNT);

        write_administrator(&e, &new_admin);
        event::set_admin(&e, admin, new_admin);
    }

    fn decimals(e: Env) -> u32 {
        read_decimal(&e)
    }

    fn name(e: Env) -> String {
        read_name(&e)
    }

    fn symbol(e: Env) -> String {
        read_symbol(&e)
    }
}
Now that we've added these files to our project, let's break down what happens in the lib.rs file above and discover how "yield" is generated from our vault contract
First, let's take a look at what happens when a user deposits tokens into the vault contract.
fn deposit(e: Env, from: Address, amount: i128) {
    // Depositor needs to authorize the deposit
    from.require_auth();

    let token = token::Client::new(&e, &get_token(&e));

    token.transfer(&from, &e.current_contract_address(), &amount);

    // Now calculate how many new vault shares to mint
    let balance = get_token_balance(&e);

    let shares = amount;

    mint_shares(&e, from, shares);
    put_reserve(&e, balance + shares);
}
- The
depositfunction is called by the depositor to deposit tokens into the vault contract. - The
transfermethod of thetoken_clientinstance transfers tokens from the depositor to the vault contract. - The current token balance and total shares issued by the vault contract are obtained using the
get_token_balanceandget_total_sharesfunctions, respectively. mint_sharesis called to issue new shares to the depositor and updates the total shares issued by the vault contract.put_reservestores the current token balance in a reserved location.
If the user were to call the deposit method with 100 tokens, the following would happen:
- 100 tokens would be transferred from the depositor to the vault contract.
- The current token balance would be stored in a reserved location.
- The total shares issued by the vault contract would be updated to 100.
- 100 shares would be issued to the depositor.
Now let's see what happens when a user withdraws tokens from the vault.
fn withdraw(e: Env, to: Address, amount: i128) -> i128 {
    to.require_auth();

    // First transfer the vault shares that need to be redeemed
    let share_token_client = token::Client::new(&e, &get_token_share(&e));
    share_token_client.transfer(&to, &e.current_contract_address(), &amount);

    // Calculate total amount including yield
    let total_amount = amount + (amount / 100);

    let token_client = token::Client::new(&e, &get_token(&e));
    token_client.transfer(&e.current_contract_address(), &to, &total_amount);

    let balance = get_token_balance(&e);
    let balance_shares = get_balance_shares(&e);

    burn_shares(&e, balance_shares);
    put_reserve(&e, balance); // Update the reserve with the actual balance

    total_amount
}
- The
withdrawfunction is called by the withdrawer to withdraw tokens from the vault contract. - The
transfermethod of theshare_token_clientinstance transfers shares from the withdrawer to the vault contract. - The
transfer_tokenmethod of thetoken_clientinstance transfers tokens from the vault contract to the withdrawer. burn_sharesis called to burn the shares that were transferred to the vault contract.put_reservestores the current token balance in a reserved location.- Returns the total amount of tokens withdrawn by the user.
Note : In the withdrawal function, you'll notice that the transfer amount is defined as
&(&amount + (&amount / &100)). This is a simple yield calculation that assumes the yield to be 1% of the amount being withdrawn. However, it's important to note that this is a very simplistic approach and may not be suitable for production-grade systems. In reality, yield calculations are more complex and involve various factors such as market conditions, risk management, and fees.
If the user were to call the withdraw method with 100 shares, the following would happen:
- 100 shares would be transferred from the withdrawer to the vault contract.
- The current token balance would be stored in a reserved location.
- 100 shares would be burned.
- 100 + (100/100) tokens would be transferred from the vault contract to the withdrawer.
Testing
To test the vault contract, we will can simply run the following command in our terminal from our vault contract directory:
#cd vault
cargo test
This will run the tests that we've written in the src/test.rs file.
running 1 test
test test::test ... ok
Vault Contract Deployment and Interaction
Now that we have a working vault contract, we can deploy it to a network and interact with it.
This section requires you to have a funded Keypair to use with Stellar's Testnet. You can create and fund one using the Stellar Lab.
Below you will find a series of commands that will help you build, deploy and interact with the vault and token contracts. You can use them to follow along as we walk through the process of building, deploying, and interacting with the contracts. It may behoove you to keep these commands in a scripts directory in your project. This way, you can easily run them from your terminal.
Note : If you decide to use scripts, be sure to double-check your import paths.
- build.sh
- deploy_token.sh
- initialize_token.sh
- mint.sh
- balance.sh
- install.sh
- deploy_vault.sh
- initialize_vault.sh
- share_id.sh
- deposit.sh
- get_rsrv.sh
- withdraw.sh
stellar contract build
stellar contract deploy \
    --wasm soroban_token_contract.wasm \
    --source-account <SECRET_KEY> \
    --rpc-url https://soroban-testnet.stellar.org:443 \
    --network-passphrase 'Test SDF Network ; September 2015'
stellar contract invoke \
    --id <TOKEN_CONTRACT_ID> \
    --source-account <SECRET_KEY> \
    --rpc-url https://soroban-testnet.stellar.org:443 \
    --network-passphrase 'Test SDF Network ; September 2015' \
    -- \
    initialize \
    --admin <USER_ADDRESS> \
    --decimal 18 \
    --name <TOKEN_NAME> \
    --symbol <TOKEN_SYMBOL>
stellar contract invoke \
    --id <TOKEN_CONTRACT_ID> \
    --source-account <SECRET_KEY> \
    --rpc-url https://soroban-testnet.stellar.org:443 \
    --network-passphrase 'Test SDF Network ; September 2015' \
    -- \
    mint \
    --to <USER_OR_VAULT_ADDRESS> \
    --amount 100
stellar contract invoke \
    --id <TOKEN_CONTRACT_ID> \
    --source-account <SECRET_KEY> \
    --rpc-url https://soroban-testnet.stellar.org:443 \
    --network-passphrase 'Test SDF Network ; September 2015' \
    -- \
        balance \
    --id <USER_OR_VAULT_ADDRESS>
stellar contract install \
    --wasm soroban_token_contract.wasm \
    --source-account <SECRET_KEY> \
    --rpc-url https://soroban-testnet.stellar.org:443 \
    --network-passphrase 'Test SDF Network ; September 2015'
stellar contract deploy \
    --wasm target/wasm32v1-none/release/vault.wasm \
    --source-account <SECRET_KEY> \
    --rpc-url https://soroban-testnet.stellar.org:443 \
    --network-passphrase 'Test SDF Network ; September 2015'
stellar contract invoke \
    --id <VAULT_CONTRACT_ID> \
    --source-account <SECRET_KEY> \
    --rpc-url https://soroban-testnet.stellar.org:443 \
    --network-passphrase 'Test SDF Network ; September 2015' \
    -- \
    initialize \
    --token_wasm_hash 73593275ee3bcacc2aef8d641a1d5108618064bdfff84a826576b8caff395add \
    --token <TOKEN_CONTRACT_ADDRESS>
stellar contract invoke \
    --id <VAULT_CONTRACT_ID> \
    --source-account <SECRET_KEY> \
    --rpc-url https://soroban-testnet.stellar.org:443 \
    --network-passphrase 'Test SDF Network ; September 2015' \
    -- \
    share_id
stellar contract invoke \
    --id <VAULT_CONTRACT_ID> \
    --source-account <SECRET_KEY> \
    --rpc-url https://soroban-testnet.stellar.org:443 \
    --network-passphrase 'Test SDF Network ; September 2015' \
    -- \
    deposit \
    --from <USER_ADDRESS> \
    --amount 100
stellar contract invoke \
    --id <VAULT_CONTRACT_ID> \
    --source-account <SECRET_KEY> \
    --rpc-url https://soroban-testnet.stellar.org:443 \
    --network-passphrase 'Test SDF Network ; September 2015' \
    -- \
    get_rsrvs
stellar contract invoke \
    --id <VAULT_CONTRACT_ID> \
    --source-account <SECRET_KEY> \
    --rpc-url https://soroban-testnet.stellar.org:443 \
    --network-passphrase 'Test SDF Network ; September 2015' \
    -- \
    withdraw \
    --to <USER_ADDRESS> \
    --amount 100
First, we need to build the vault contract. We can do this by running the build.sh script from our vault directory.
##cd vault
stellar contract build
Next, we need to deploy the token contract. We can do this by running the deploy_token.sh script.
stellar contract deploy \
    --wasm soroban_token_contract.wasm \
    --source-account <SECRET_KEY> \
    --rpc-url https://soroban-testnet.stellar.org:443 \
    --network-passphrase 'Test SDF Network ; September 2015'
We should receive an output with the token contract ID. We will need this ID for the next step.
CBYMG7OPIT67AG4S2FZU7LAYCXUSXEHRGHLDE6H26VCVWNOV7QUQTGNU
Next we need to initialize the token contract. We can do this by running the initialize_token.sh script.
stellar contract invoke \
    --id <TOKEN_CONTRACT_ID> \
    --source-account <SECRET_KEY> \
    --rpc-url https://soroban-testnet.stellar.org:443 \
    --network-passphrase 'Test SDF Network ; September 2015' \
    -- \
    initialize \
    --admin <USER_ADDRESS> \
    --decimal 18 \
    --name <TOKEN_NAME> \
    --symbol <TOKEN_SYMBOL>
Next, we need to deploy the vault contract. We can do this by running the deploy_vault.sh script.
stellar contract deploy \
    --wasm target/wasm32v1-none/release/vault.wasm \
    --source-account <SECRET_KEY> \
    --rpc-url https://soroban-testnet.stellar.org:443 \
    --network-passphrase 'Test SDF Network ; September 2015'
We should receive an output with the vault contract ID. We will need this ID for the next step.
CBBPLE6TGYOMO5HUF2AMYLSYYXM2VYZVAVYI5QCCM5OCFRZPBE2XA53F
Now we need to get the Wasm hash of the token contract. We can do this by running the get_token_wasm_hash.sh script.
stellar contract install \
    --wasm soroban_token_contract.wasm \
    --source-account <SECRET_KEY> \
    --rpc-url https://soroban-testnet.stellar.org:443 \
    --network-passphrase 'Test SDF Network ; September 2015'
We should receive the Wasm hash of the token contract.
6b7e4bfbf47157a12e24e564efc1f9ac237e7ae6d7056b6c2ab47178b9e7a510
Now we need to initialize the vault contract. We can do this by running the initialize_vault.sh script and passing in the token contract ID and token contract Wasm hash.
stellar contract invoke \
    --id <VAULT_CONTRACT_ID> \
    --source-account <SECRET_KEY> \
    --rpc-url https://soroban-testnet.stellar.org:443 \
    --network-passphrase 'Test SDF Network ; September 2015' \
    -- \
    initialize \
    --token_wasm_hash 6b7e4bfbf47157a12e24e564efc1f9ac237e7ae6d7056b6c2ab47178b9e7a510 \
    --token <TOKEN_CONTRACT_ADDRESS>
After receiving the transaction has been submitted, we will mint some tokens to both our User Account and Vault Contract addresses. We can do this by running the mint.sh script.
stellar contract invoke \
    --id <TOKEN_CONTRACT_ID> \
    --source-account <SECRET_KEY> \
    --rpc-url https://soroban-testnet.stellar.org:443 \
    --network-passphrase 'Test SDF Network ; September 2015' \
    -- \
    mint \
    --to <USER_OR_VAULT_ADDRESS> \
    --amount 100
After submitting the transaction, we can check the balance of the account. We can do this by running the balance.sh script.
stellar contract invoke \
    --id <TOKEN_CONTRACT_ID> \
    --source-account <SECRET_KEY> \
    --rpc-url https://soroban-testnet.stellar.org:443 \
    --network-passphrase 'Test SDF Network ; September 2015' \
    -- \
        balance \
    --id <USER_ADDRESS>
We should receive an output with the balance of the account.
100
Now we can deposit some tokens into our vault. We can do this by running the deposit.sh script.
stellar contract invoke \
    --id <VAULT_CONTRACT_ID> \
    --source-account <ACCOUNT_SECRET_KEY> \
    --rpc-url https://soroban-testnet.stellar.org:443 \
    --network-passphrase 'Test SDF Network ; September 2015' \
    -- \
    deposit \
    --from <USER_ADDRESS> \
    --amount 100
After submitting the transaction, we can check the reserves of the vault. We can do this by running the reserves.sh script.
stellar contract invoke \
    --id <VAULT_CONTRACT_ID> \
    --source-account <SECRET_KEY> \
    --rpc-url https://soroban-testnet.stellar.org:443 \
    --network-passphrase 'Test SDF Network ; September 2015' \
    -- \
    get_rsrvs
We should receive an output with the reserves of the vault.
"200"
100 from the deposit and 100 from the mint.
Now we can withdraw some tokens from the vault. We can do this by running the withdraw.sh script.
stellar contract invoke \
    --id <VAULT_CONTRACT_ID> \
    --source-account <SECRET_KEY> \
    --rpc-url https://soroban-testnet.stellar.org:443 \
    --network-passphrase 'Test SDF Network ; September 2015' \
    -- \
    withdraw \
    --to <USER_ADDRESS> \
    --amount 100
We should receive an output with the withdrawal amount.
"100"
Now is a good time to check our account balance again. We can do this by running the balance.sh script.
We should see our balance has increased the amount we withdrew plus yield (amount/100) or %1 of our withdraw amount.
101
And finally, we can check the reserves of the vault again. We can do this by running the get_rsrv.sh script.
We should see the reserves of the vault have decreased by the amount we withdrew + yield.
"99"
And there you have it! You have successfully deployed and interacted with the vault contract!
Its important to note that this is not a production ready contract and is only meant to demonstrate the capabilities of the Soroban smart contract platform. We hope to see much more complex yield contracts deployed with Soroban in the future, and we hope you will be a part of it!